
This shop has been compensated by Collective Bias, Inc. and its advertiser. All opinions are mine alone. #EggcellentTreats #CollectiveBias
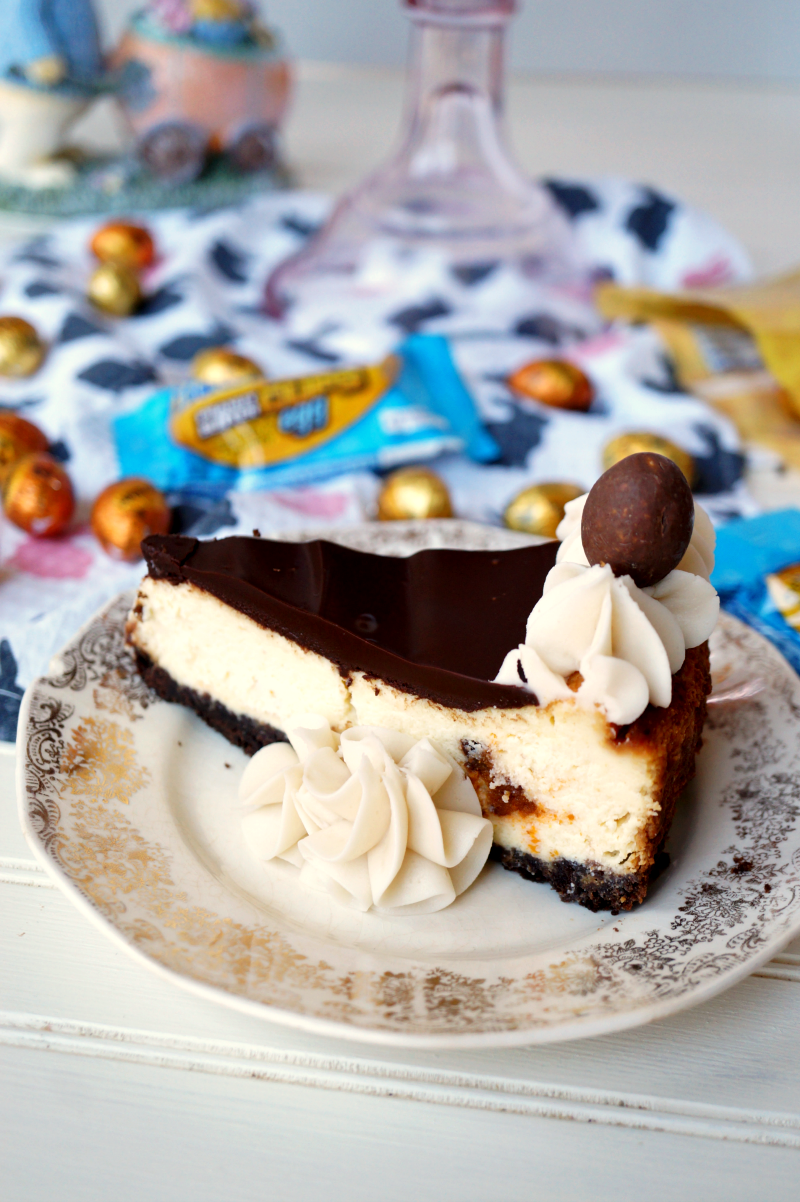
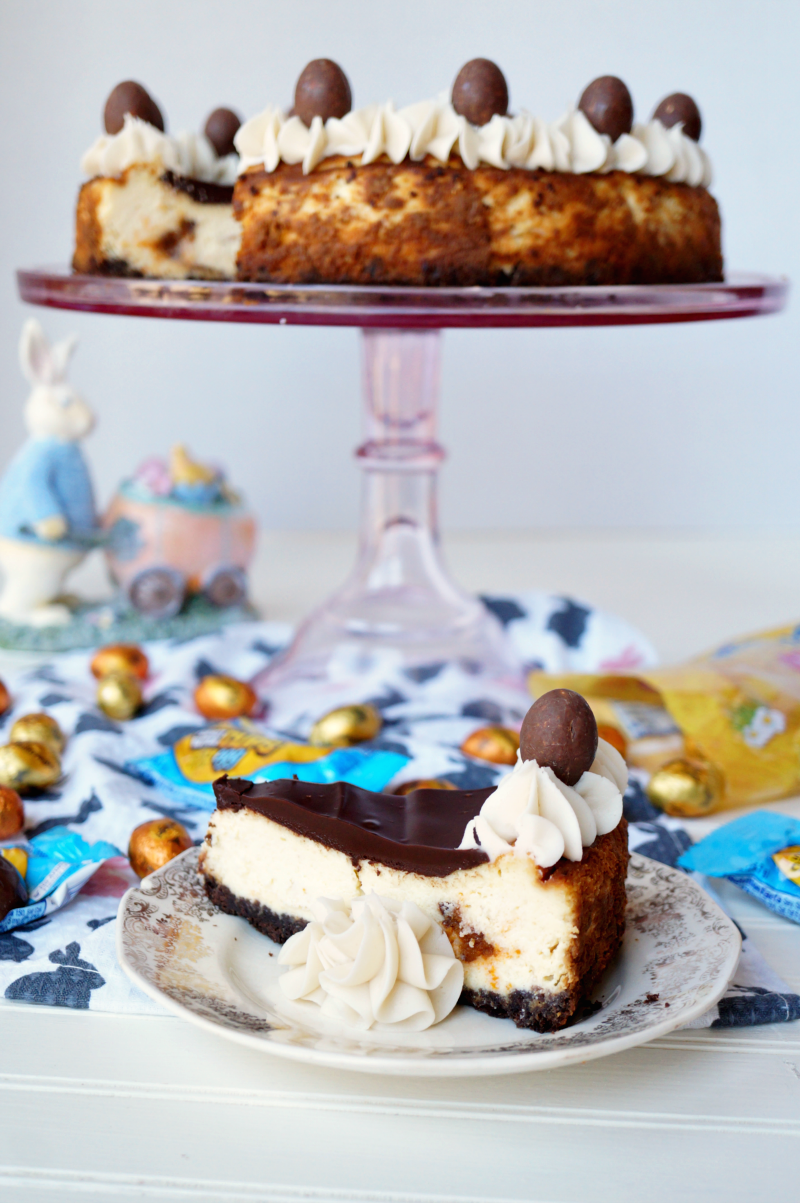
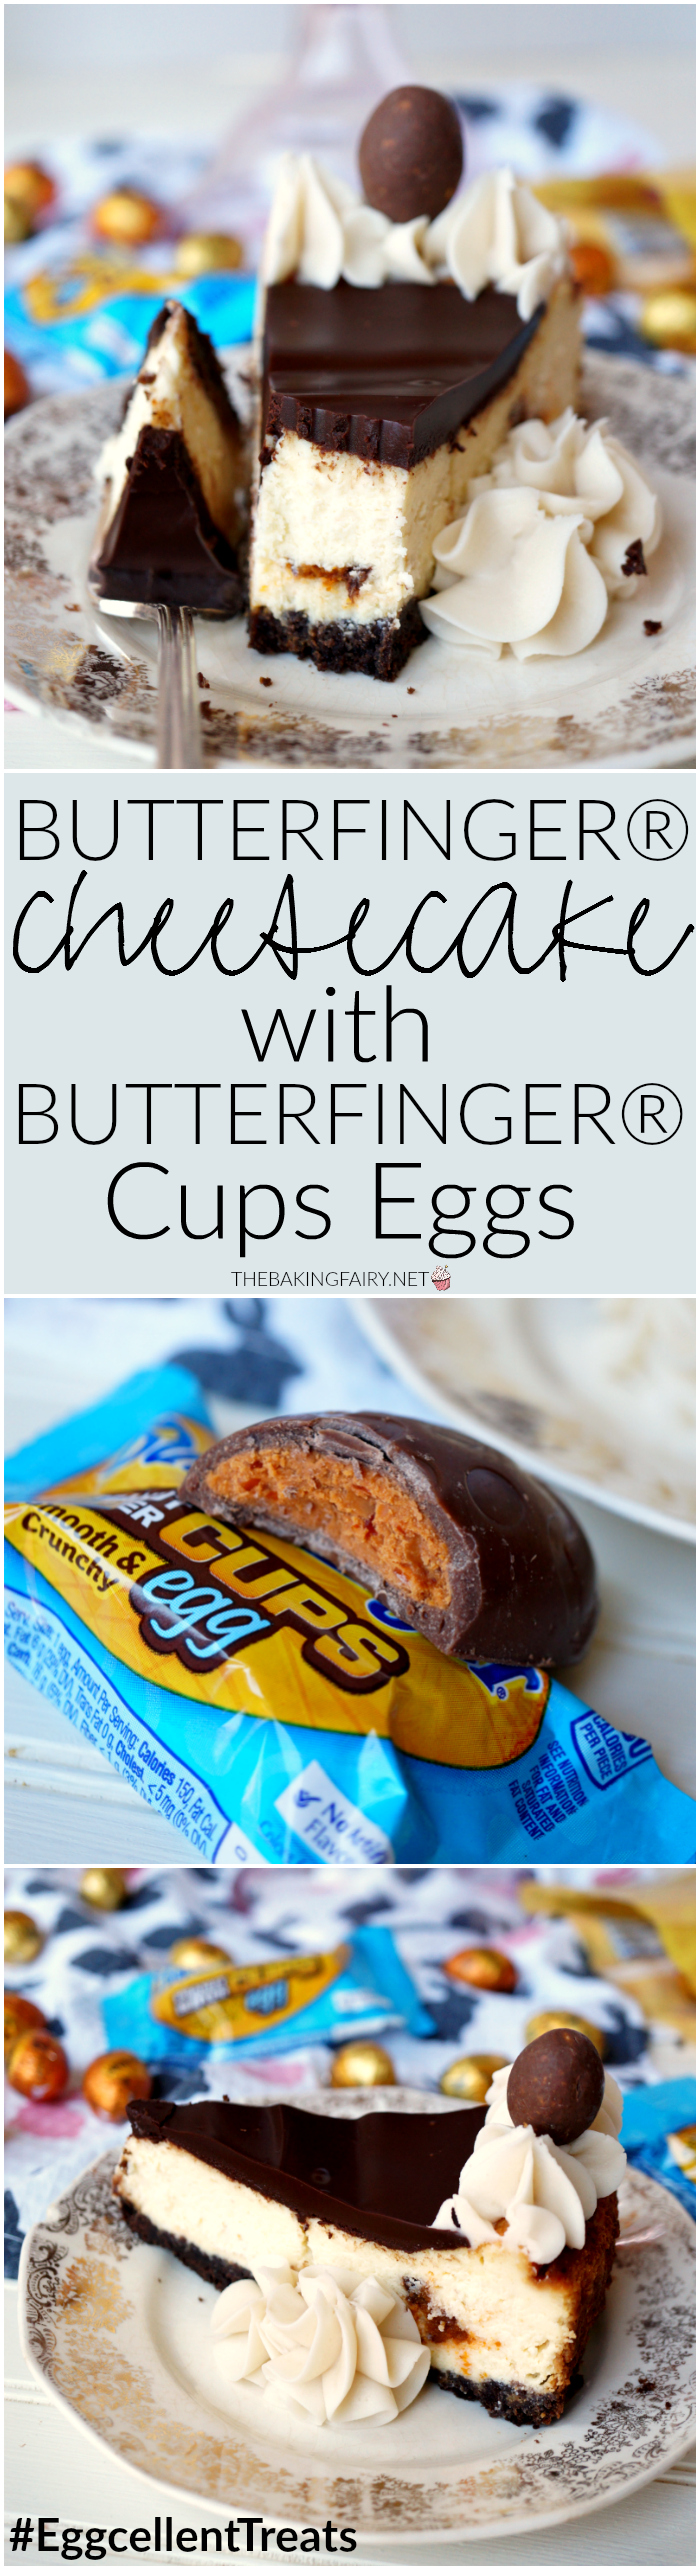
Hello, friends! We are officially less than a week away from Easter, and I'm sharing the perfect dessert with you today. Think... make-ahead, completely delicious, and an absolute crowd-pleaser. Say hello to the BUTTERFINGER® Cheesecake! This baby combines the scrumptious BUTTERFINGER® Cups Eggs and NestEggs with a chocolate graham cracker crust and a creamy, dreamy cheesecake base for the ultimate Easter sweet. Let me show you how it's made!
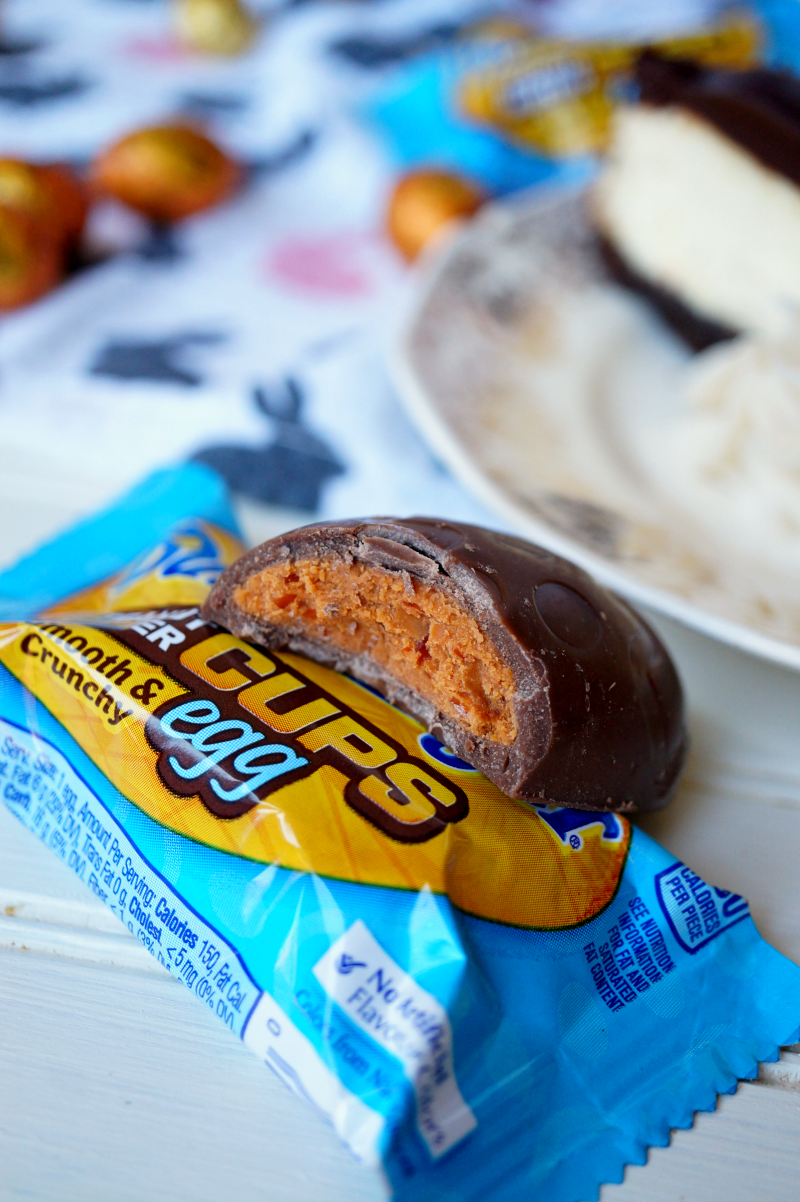
I recently discovered BUTTERFINGER® Cups, and I totally fell in love! They are the perfect ratio of creamy milk chocolate to crunchy, addictive peanut butter filling. I couldn't have been happier to find an adorable egg-shaped Easter version! Chocolate is an absolute must for this holiday, and BUTTERFINGER® have the bonus of containing absolutely no artificial colors or flavors, as the pretty orange color is added from natural sources.
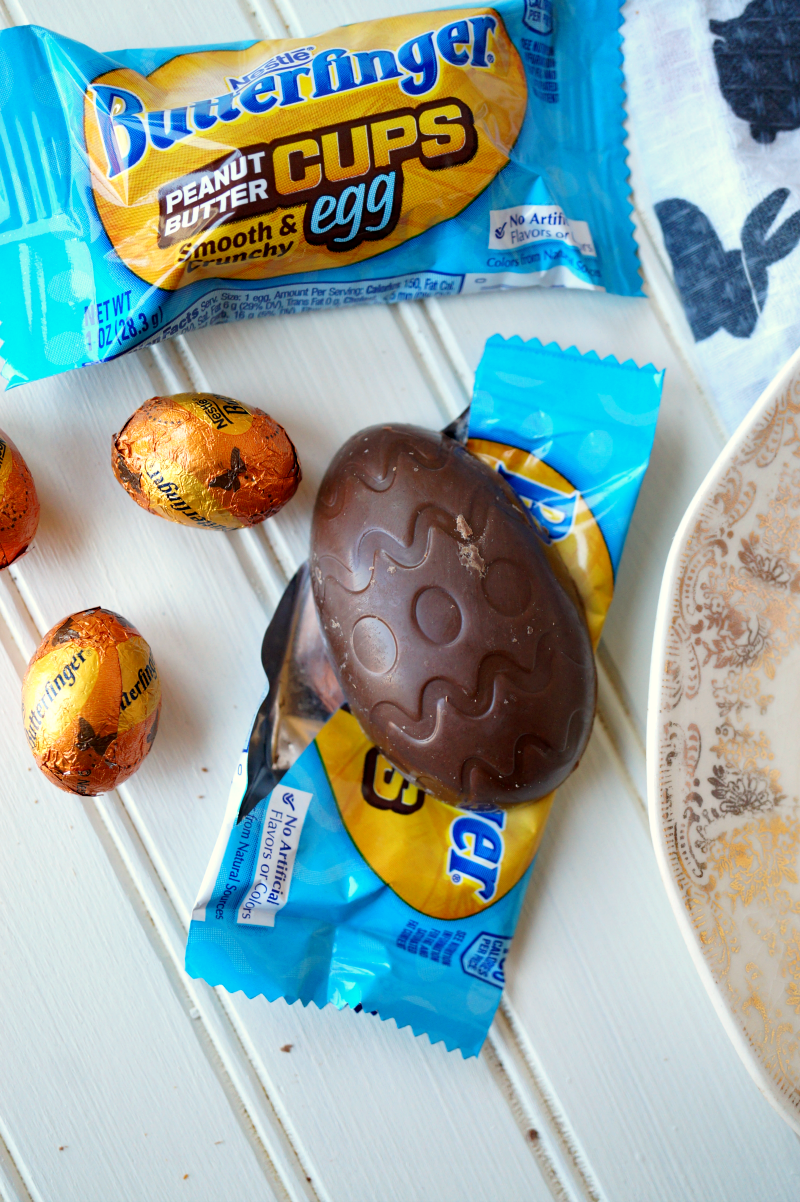
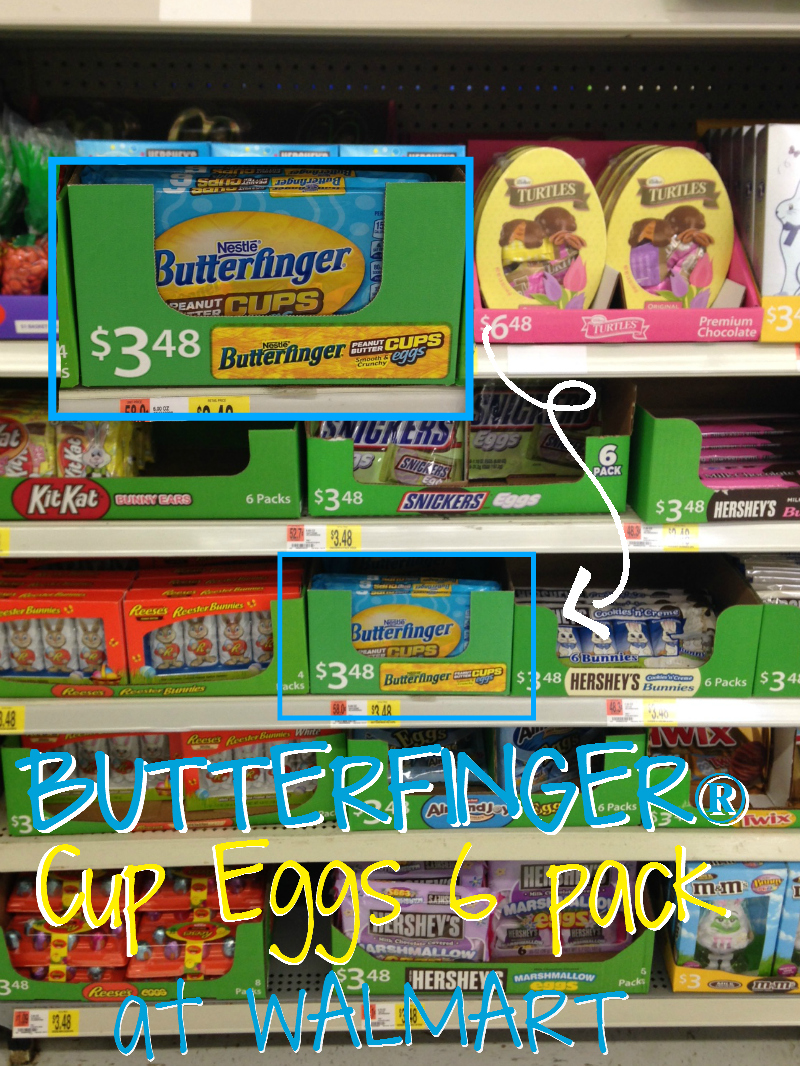
To find these delicious little bites, go to your local Walmart and check out their seasonal Easter aisle! I was able to find both the BUTTERFINGER® Cups Eggs in a 6 pack and the BUTTERFINGER® NestEggs without a problem. While you're shopping, why not pick up some Easter shortcuts? One of my favorite tricks is to buy dinner rolls from the bakery and just heat them up in the oven for a few minutes before serving. They're just as good as homemade and with pretty much zero effort! Considering my family eats massive amounts of rolls at every holiday, it's easy to stock up this way and not have to worry that we will run out before the meal is over.
Cheesecake is a delectable, well-loved dessert, but it can be a little tricky to make! I have a few tips for you today to ensure cheesecake perfection. First, make sure that you use a springform pan (with removable sides), and that you grease it well. Even a perfect, beautiful cheesecake is no good if it's stuck to the pan! Another tip is to place a 9 x 13 pan of water in the oven on the rack below your cheesecake, and to fill it with water. As the cheesecake cooks, the water creates steam, which should help prevent cracks. And lastly... be patient! This dessert has very little hands-on work, but tons of waiting. Once it's cooked through, let it rest in the oven with the door cracked until it cools off a bit, then let it come to room temperature, then refrigerate it overnight so it can set completely. This should help it stay crack-free! And if worse comes to worse, well... that's what the chocolate ganache on top is for 😉

If you're wanting more inspiration and BUTTERFINGER® recipe ideas, you can check out the Flavorful Moments Pinterest Board, as well as the official BUTTERFINGER® site! You can also see all of the NESTLE® products available at Walmart HERE. Happy shopping and happy baking!
BUTTERFINGER® cheesecake
Ingredients
- *for the crust*
- 5 tablespoon unsalted butter melted
- 2 cups finely crushed chocolate graham crackers
- *for the cheesecake*
- 6 BUTTERFINGER® Cups Eggs roughly chopped
- 4 8 oz packages cream cheese 32 oz total
- 1 cup sour cream
- 1 cup white granulated sugar
- 1 tablespoon vanilla extract
- 4 eggs
- *for the ganache*
- 7 oz semisweet chocolate chips
- 4 tablespoon ½ stick unsalted butter
- *for the frosting*
- 4 tablespoon ½ stick unsalted butter, softened
- 1 ½ cups powdered sugar
- 1 teaspoon vanilla extract
- 1-2 tablespoon heavy cream
- pinch of salt
- BUTTERFINGER® NestEggs to decorate
Instructions
- First, preheat the oven to 325F. Grab a 9x13 baking dish, position it just below the middle rack of the oven, and fill it halfway with water.
- Grab a 10 inch springform pan with removable sides, and grease the bottom well. Combine the crushed graham crackers and melted butter for the crust, then press in the prepared pan. Bake for about 5 minutes, then remove and set aside to cool slightly.
- Prepare the cheesecake mixture. In the bowl of a stand mixer fitted with the paddle attachment, beat the cream cheese until smooth and creamy. Add in the sugar and sour cream, followed by the vanilla extract.
- Add in the eggs, one at a time, beating until just incorporated. Don't overbeat or you will incorporate too much air in the mixture which will result in cracking.
- Finally, stir in the BUTTERFINGER® Cups Egg pieces, and pour the cheesecake on the prepared crust. Place in preheated oven on the rack just above the pan of water.
- Bake for 75-80 minutes, until cheesecake is lightly browned around the edges and has a slight jiggle in the center. If cheesecake seems to be browning too fast during cooking, cover it with a piece of foil.
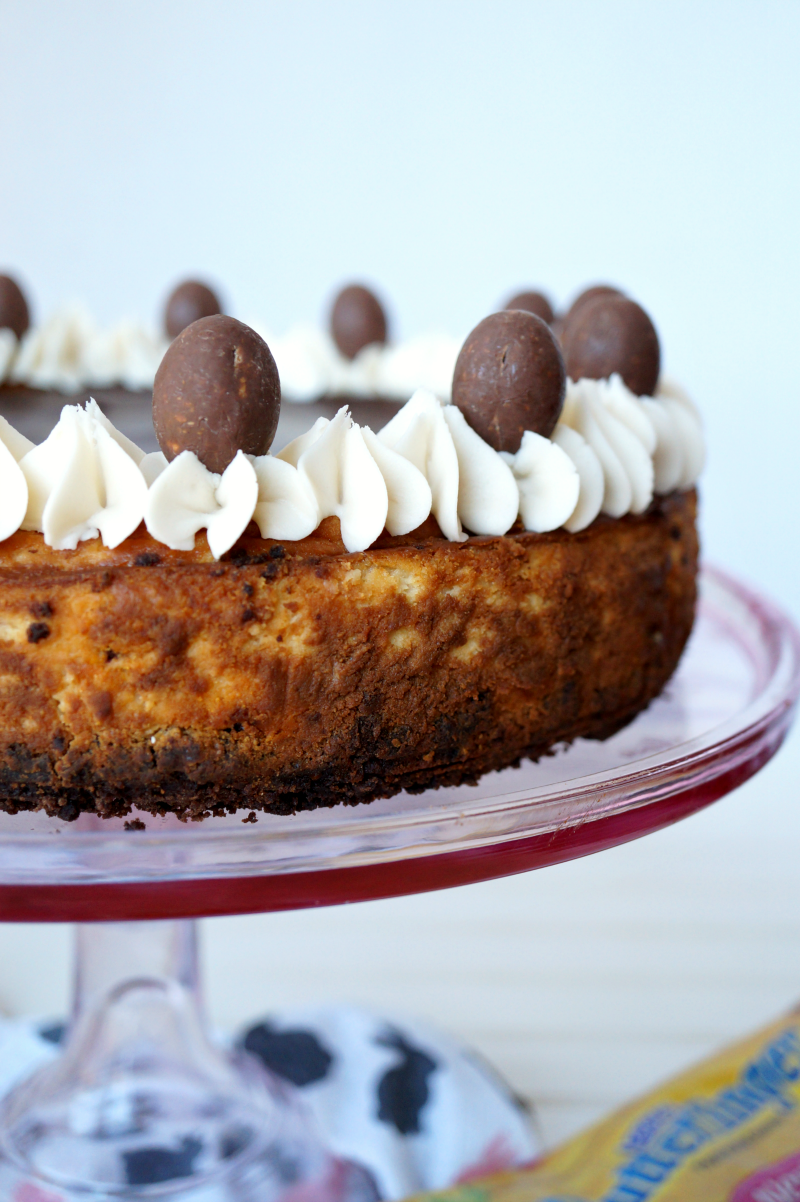
- When cooked through, let the cheesecake sit in the oven with the door cracked a few inches for 1-2 hours, until it cools significantly. At this point, let it rest at room temperature for another hour, then wrap tightly and place in fridge for at least 5-6 hours, but optimally overnight. When cheesecake is completely cooled, run a knife along the edges of the pan before opening the springform, and transfer the cheesecake to a serving platter.
- About an hour before serving, prepare the ganache by heating the butter and chocolate chips in a pot over medium-low heat, stirring until smooth and melted. Simply pour this on top of the cheesecake, and smooth with a spoon or spatula. Place the cheesecake back in the fridge so the ganache can set while you make the frosting.
- For the frosting, beat the butter in the bowl of a stand mixer fitted with the whisk attachment, until smooth. Add in the powdered sugar, salt, and vanilla, then add in the heavy cream, a little at a time, until a buttercream forms.
- Decorate the cheesecake with frosting as desired, and top with the unwrapped BUTTERFINGER® NestEggs. Keep chilled until ready to serve!


Kari says
This cheesecake looks so delicious! It combos two of my favorite things!
Kari
http://www.sweetteasweetie.com
grace says
this would be delicious even without the addition of butterfinger bits, but what a great addition! beautiful dessert!