
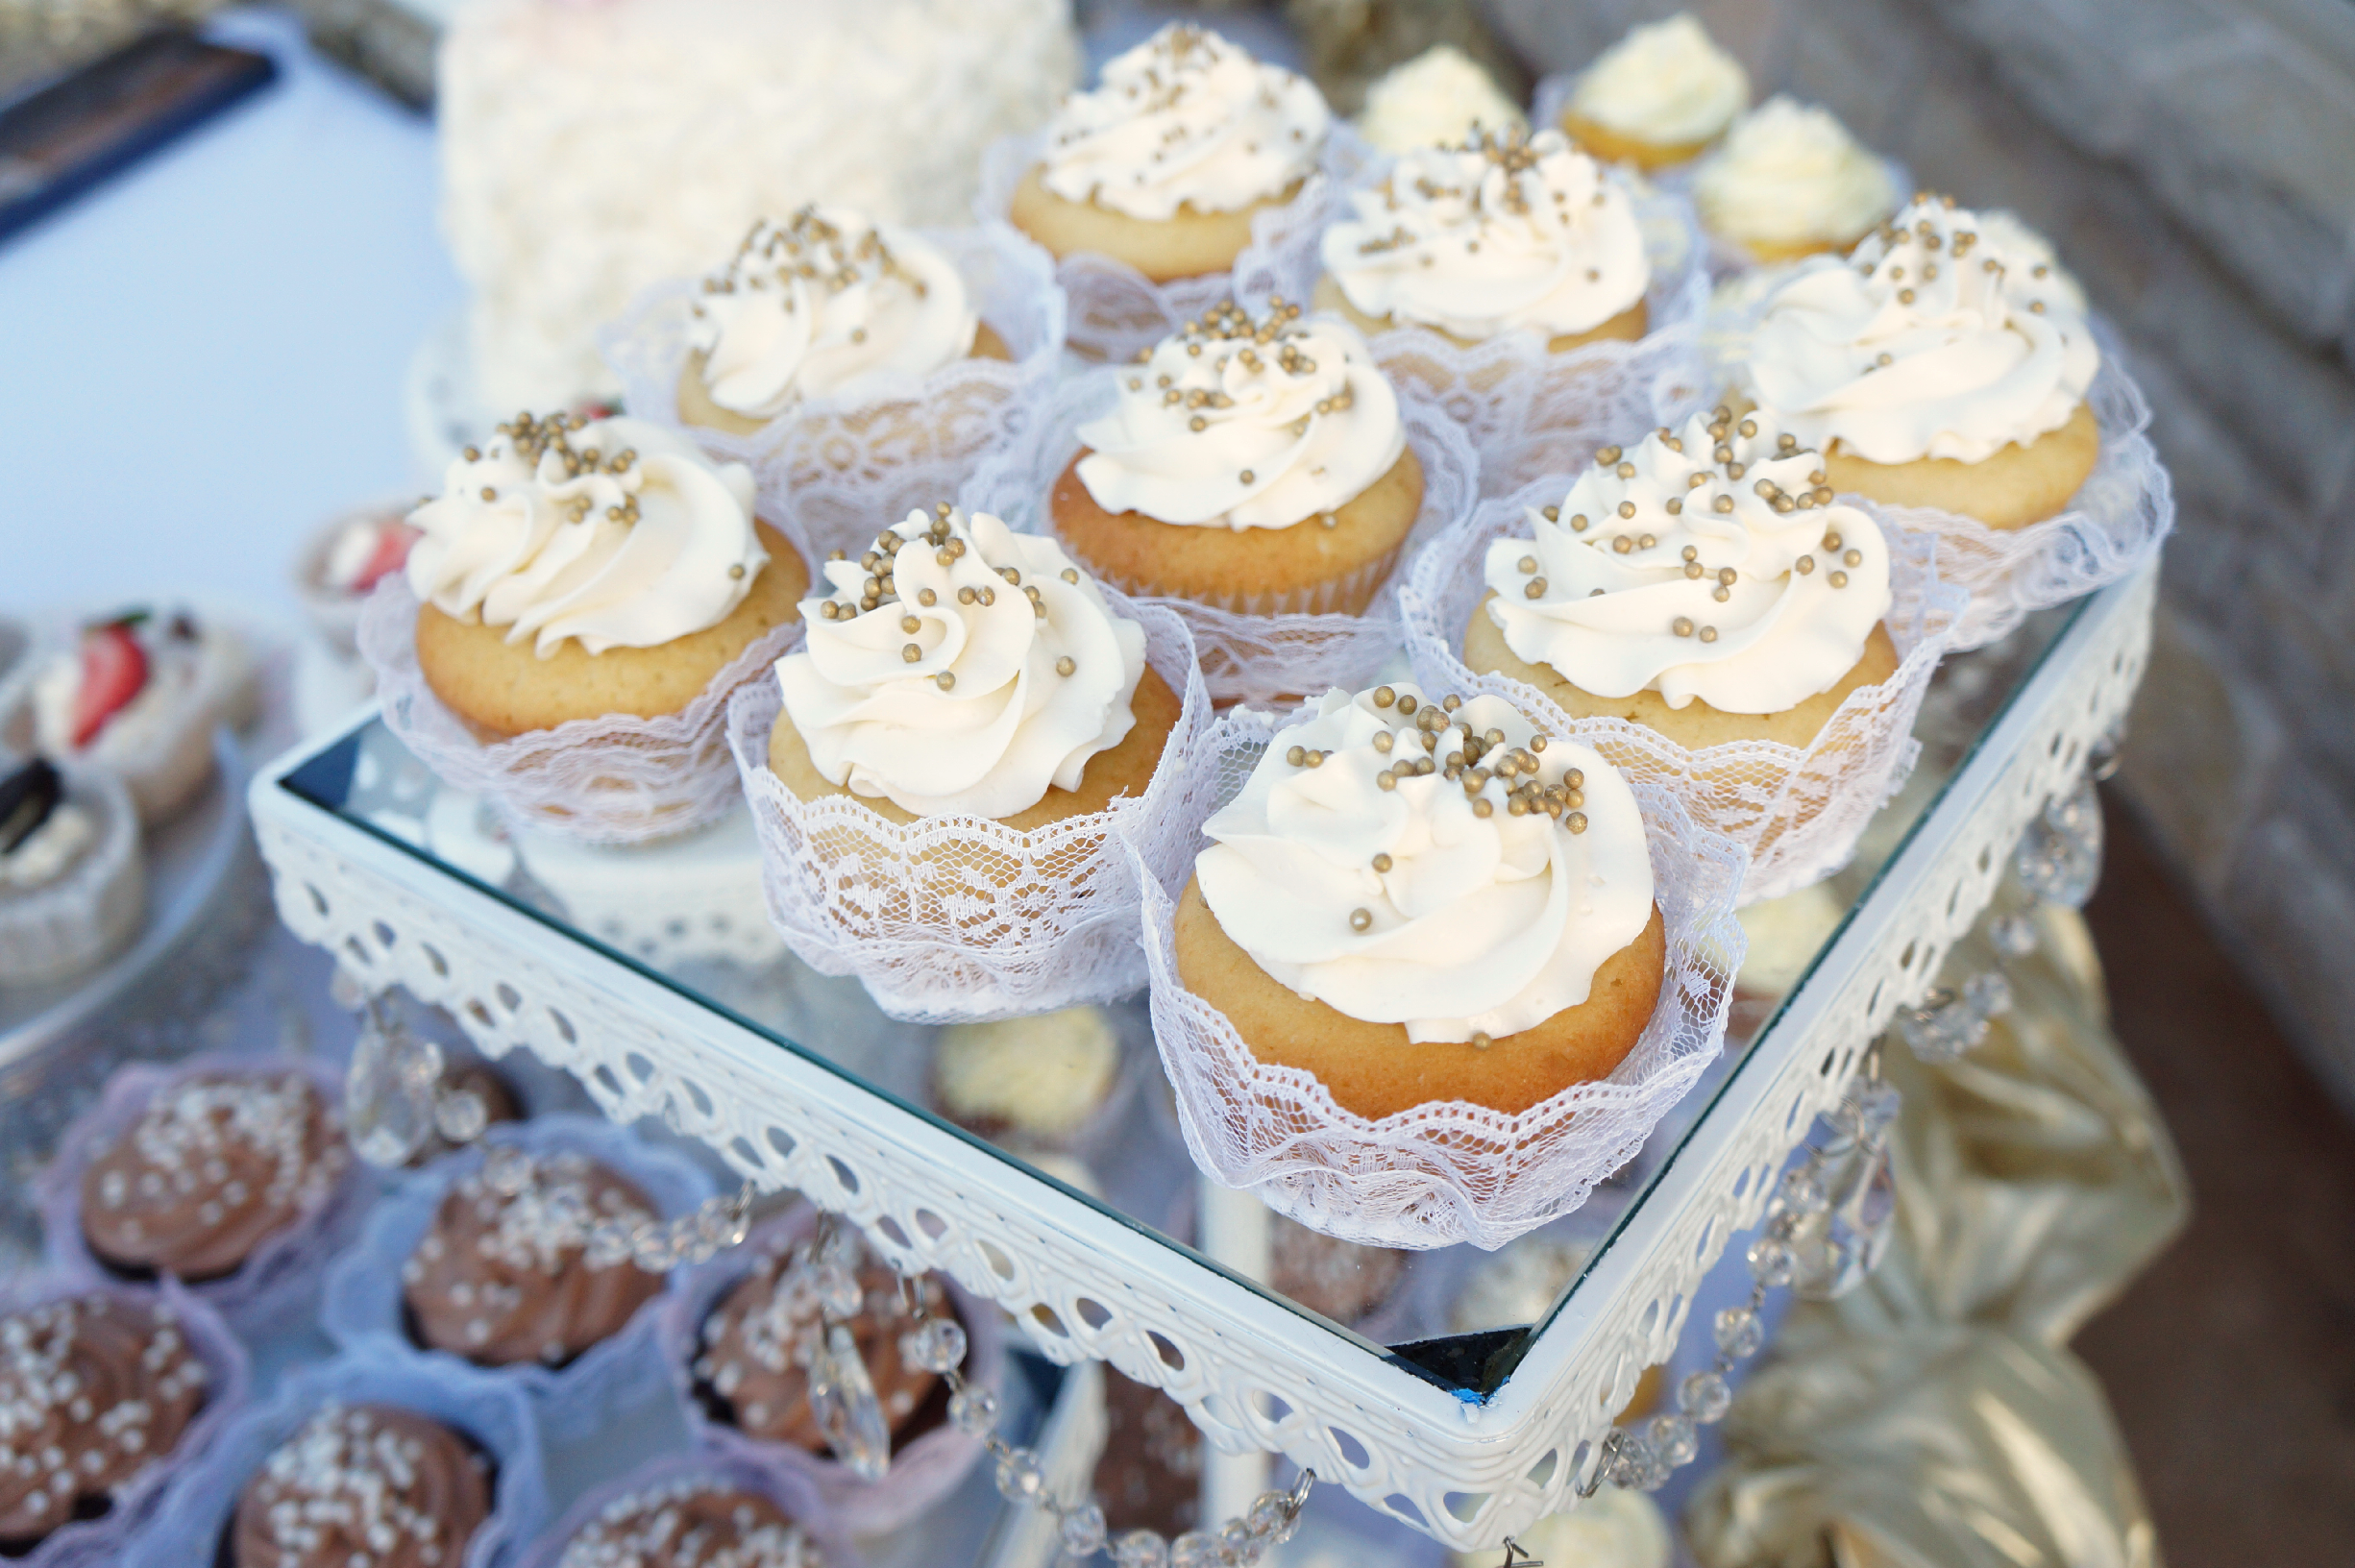
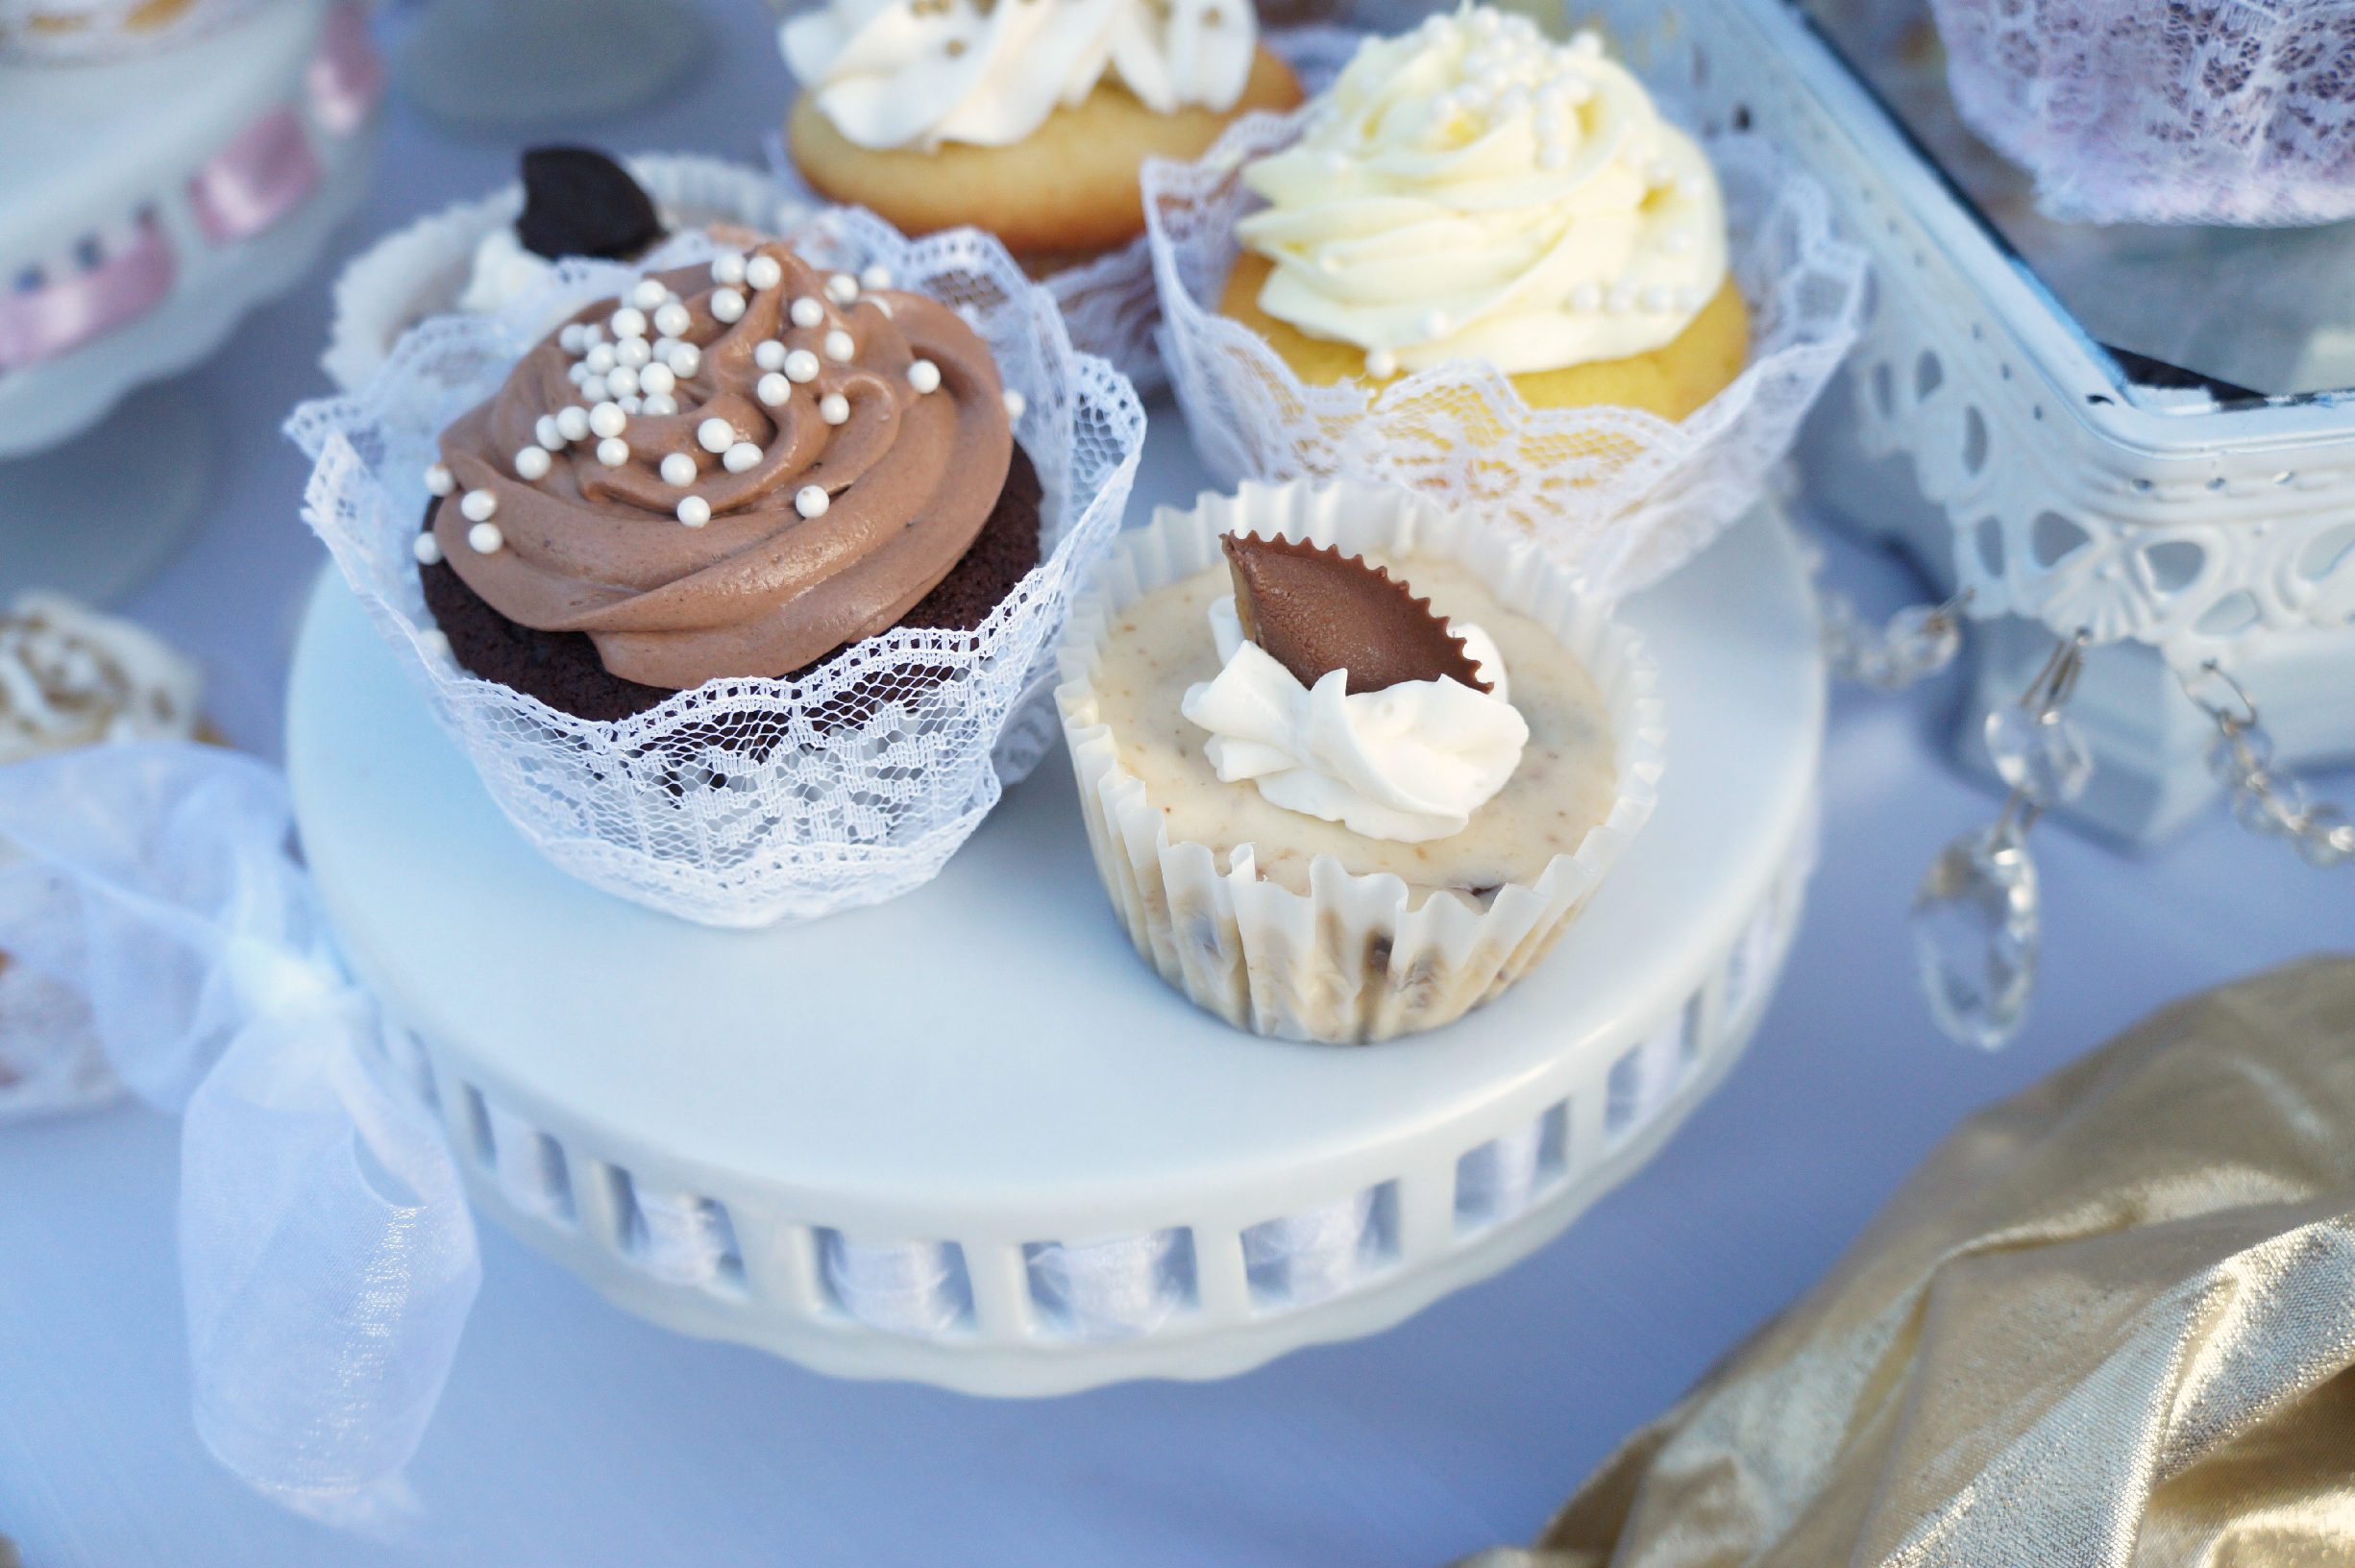
Hello, lovelies! Today we are having some WEDDING talk... eeep! No, we are not talking about the wedding cake yet, though that is coming soon. Promise! I'm just waiting on the professional bride and groom pictures to come in so I can include them in the post. Everybody wants to see the cake, but I'm willing to bet everybody wants to see the beautiful bride and her handsome husband, too! Along with some pictures of the ceremony and reception. I seriously LOVED everything about what they did, from the color scheme to the centerpieces to other cute little crafty details that were included, so I'm super excited to share those with y'all! For now, I am sharing one of the crafty little extras that I took care of. Lace cupcake liners!
This small side project was super easy but turned out so gorgeous, and added a beautiful sophisticated touch to the dessert table! Granted, this took me a good while, but that was because I had to make like, 80 of them. And even then, I didn't think they were too time consuming or frustrating to make at all! All you need is two things: lace, and hot glue. Let's make some cute cupcake liners!
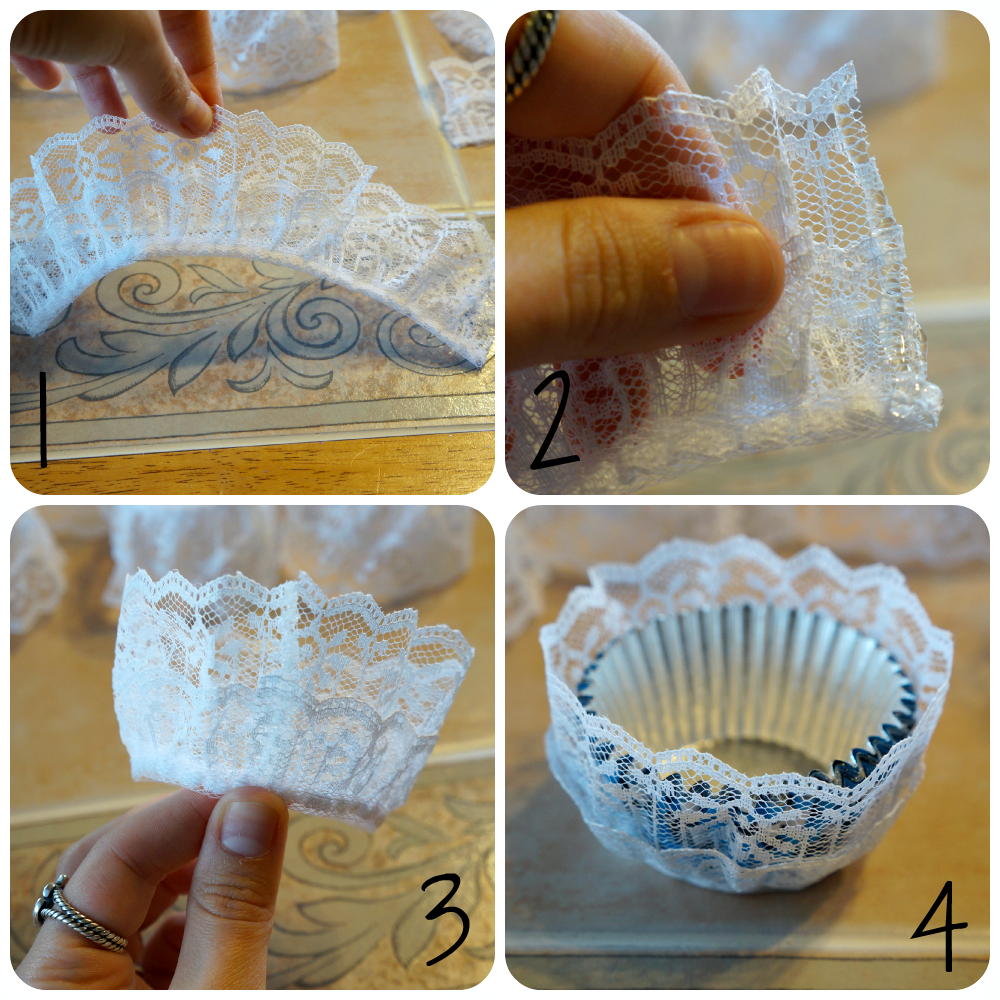 1. Using some actual paper cupcake wrappers, measure out your lace, and cut the correct amount. Do keep in mind that your liner measurements will be a little bit big! Initially, using just cupcake wrappers, I cut out 7 inch sections which seemed to work out fine. When I tried them on actual cupcakes, however, they were a bit looser than I wanted, so then I made the ones after that more like 6 to 6.5 inches.
2. Using your hot glue gun, pipe a line of glue right on the edge of the lace.
3. Join the two edges of the lace onto the hot glue, and use fingertips to smooth down {you want to avoid having a lumpy hot glue line!}. If you are worried about burning your fingertips, just let the hot glue sit for a few seconds, then join the ends and smooth down.
4. While glue is still a little soft, try the liner onto the paper cupcake liners! If it's too loose, you can quickly pull the goopy glued ends apart, and re-glue tighter. Once you do a couple, you'll figure out the perfect measurements and it'll go by quick!
Some tips:
- Cut lace only a few millimeters longer than a perfect fit around the cupcake. The less leftover lace on the wrapper, the more seamless the effect will be. You want it to look like the lace is all one piece!
- Bake your cupcakes in plain white paper liners, and you might even want to double up with dark flavors like chocolate. This will make the lace and actual wrapper look better together.
- Once you figure out the right length of lace for one wrapper, cut them all at once, and then glue them as you go. Makes it go by faster!
- If going by 7 inch measurements {just to be safe}, 1 yard of lace will yield 4-5 wrappers. For 75 lace wraps, I used over 11 yards of lace!
- Good news: even though this might be time-consuming when making a lot, it's definitely cost-effective! The two-layered lace used in the tutorial cost me about $1.99/yard, while single layered lace can be as cheap as $0.99/yard. Fancier lace can cost up to $2.50/yard, which isn't too bad but can add up fast! Besides, they will probably get frosting all over them, so I wouldn't get something super pricey.
Well, that's all! I hope this quick and easy tutorial inspired you to dress up your cupcakes for your next event. Happy crafting, and keep and eye out for more wedding posts coming soon!


Dallas says
What was the width of the lace you used?
valentina says
I honestly don't remember for sure, but I would say probably around 2 inches 🙂
Dallas says
Awesome! That is what I bought however my lace isn't bunched at the bottom like yours looks so it's making it difficult to fit properly around the cupcake. Would you know how I could maybe fix that? Maybe bunch and glue it a little?
valentina says
Oh no! Well, I think gluing and bunching a little could work. Or maybe as you're gluing, try to make the "bottom" a little smaller and the "top" a little wider... if that makes sense? So that the part that sits at the bottom of the cupcake is tighter and the top is looser. I'm not sure if I'm explaining it right lol! Good luck, I'm sure they will look awesome no matter what!
Nicole says
Thank you!! Needed your guidelines for my daughter’s wedding! Love this!