
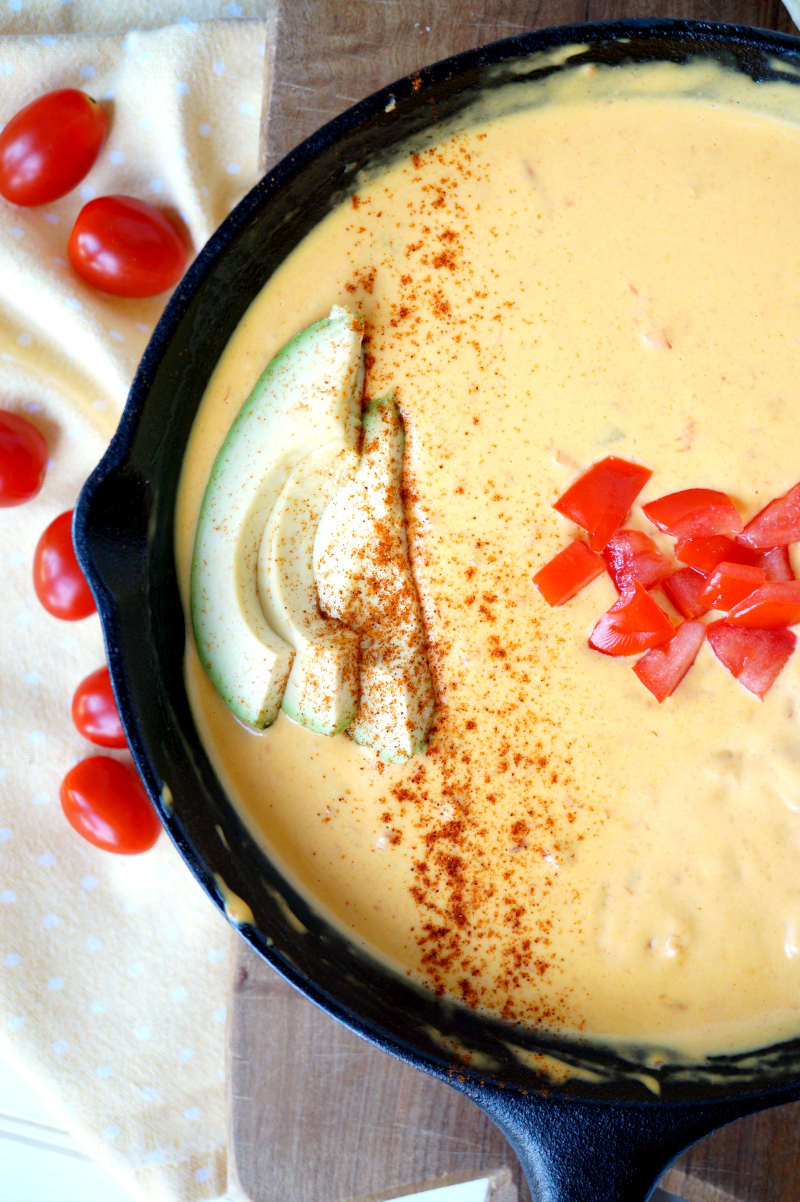
After the success of my white queso, I've made you a new and improved 6-Ingredient Classic Yellow Queso! It's smooth, creamy, cheesy, and as always, made with real food. No Velveeta!

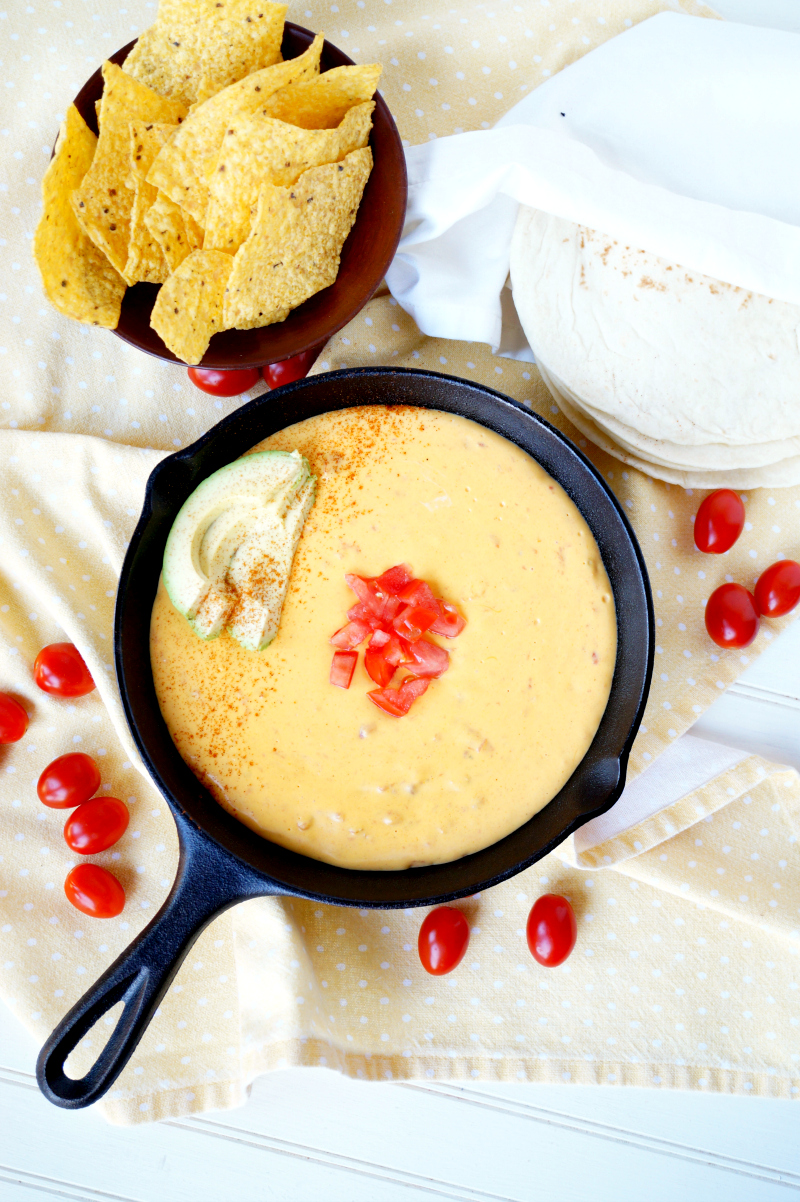
You guys have asked, and I have delivered! After the complete, booming success of my 5-Ingredient White Queso... I've come up with a new and improved version. 6-Ingredient YELLOW Queso! How could I possibly create something better than my all-time most popular recipe? I don't know but, y'all... I did it. I think this yellow queso tastes even better than the original. It is six ingredients because I've discovered a blend of two cheeses works better than one alone, but it's just as simple to make as the white queso, and SO good. Let's make it!
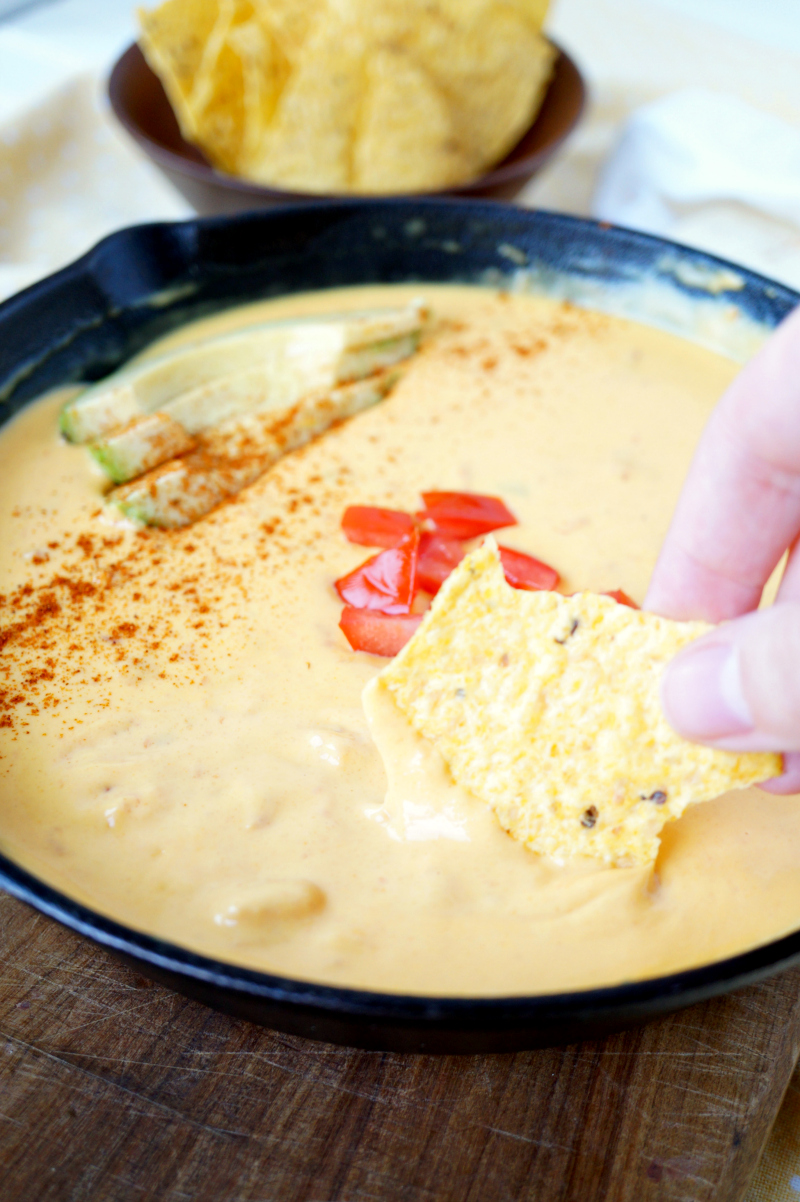
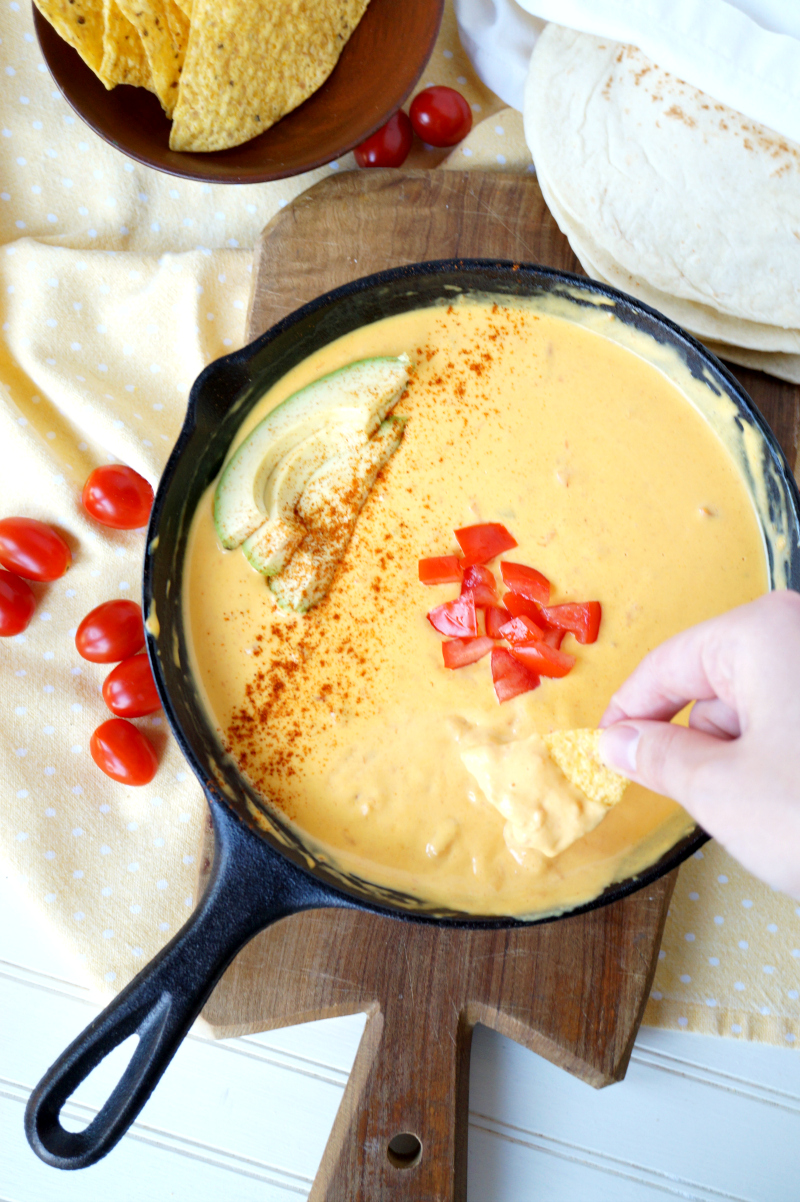
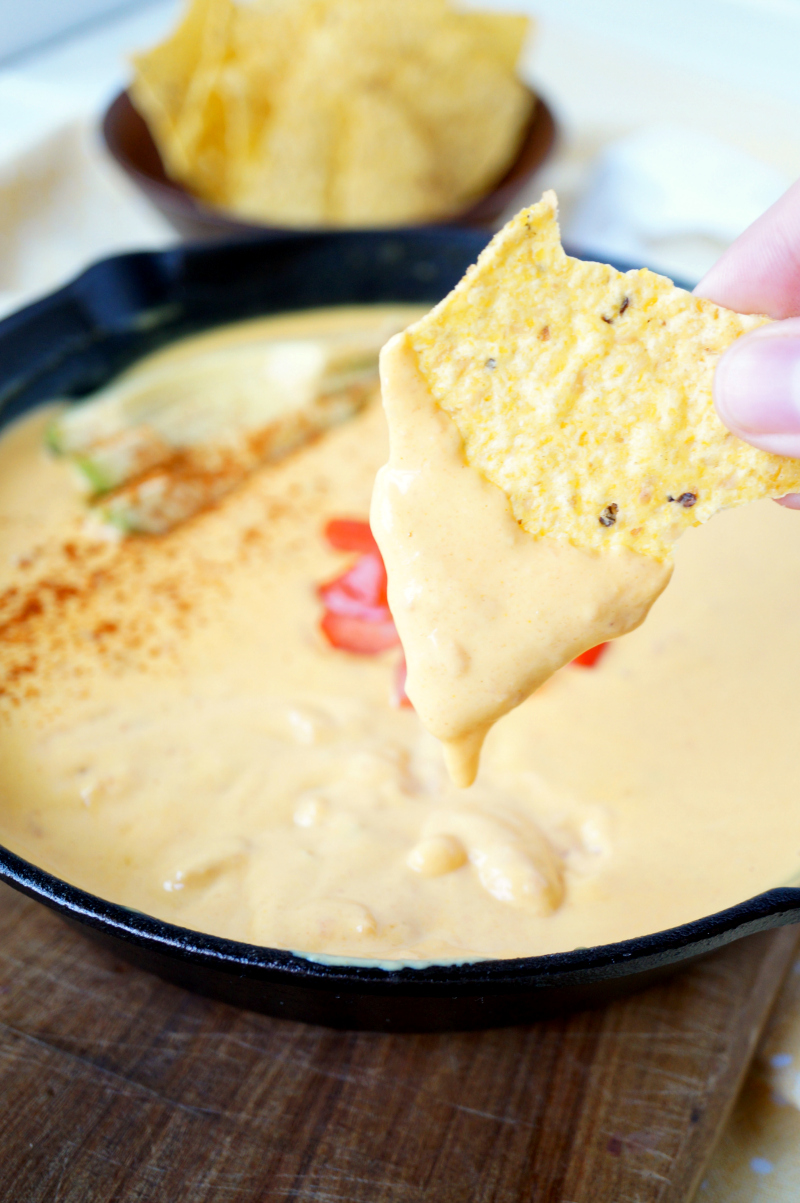
I started my journey to a better queso by targeting some common complaints from the original queso. A BIG one people had was that it was lumpy and didn't melt well. Again, I reiterate in this recipe, real cheese is MUCH pickier than Velveeta. You can literally boil Velveeta and it will not curdle or clump. Real cheese is not quite as forgiving, so you have to be very patient and heat this baby low and slooooow. I sat at my stove for a decent 15-20 minutes stirring while this yellow queso very slowly melted. I did notice that when it's mostly melted {i.e. the cheddar and american cheeses are melted but the cream cheese isn't}, that it will seem pretty lumpy. However, keep heating and mixing and once the cream cheese melts too, you'll be rewarded with smooth, cheesy goodness!
Another complaint... that it was bland. Dude, really? It's queso. Cheese is bland by nature. But, I listened to you, and I did add some more seasonings this time around. One magic seasoning that isn't totally necessary but works really well... turmeric! It doesn't add much in flavor, but it gives your queso that bright yellow, cheesy look we all know and love. Nobody has to know the cheese had a little help 😉 I also added some mainstays like paprika, garlic powder, onion powder, and a touch of chili powder. Also, true to many reader comments, my queso was thin enough without any additions, so no milk this time. I hope y'all love this yellow queso as much as you've loved the white queso! If you have any questions or comments, as always let me know and I'll be happy to help 🙂 Happy dipping!
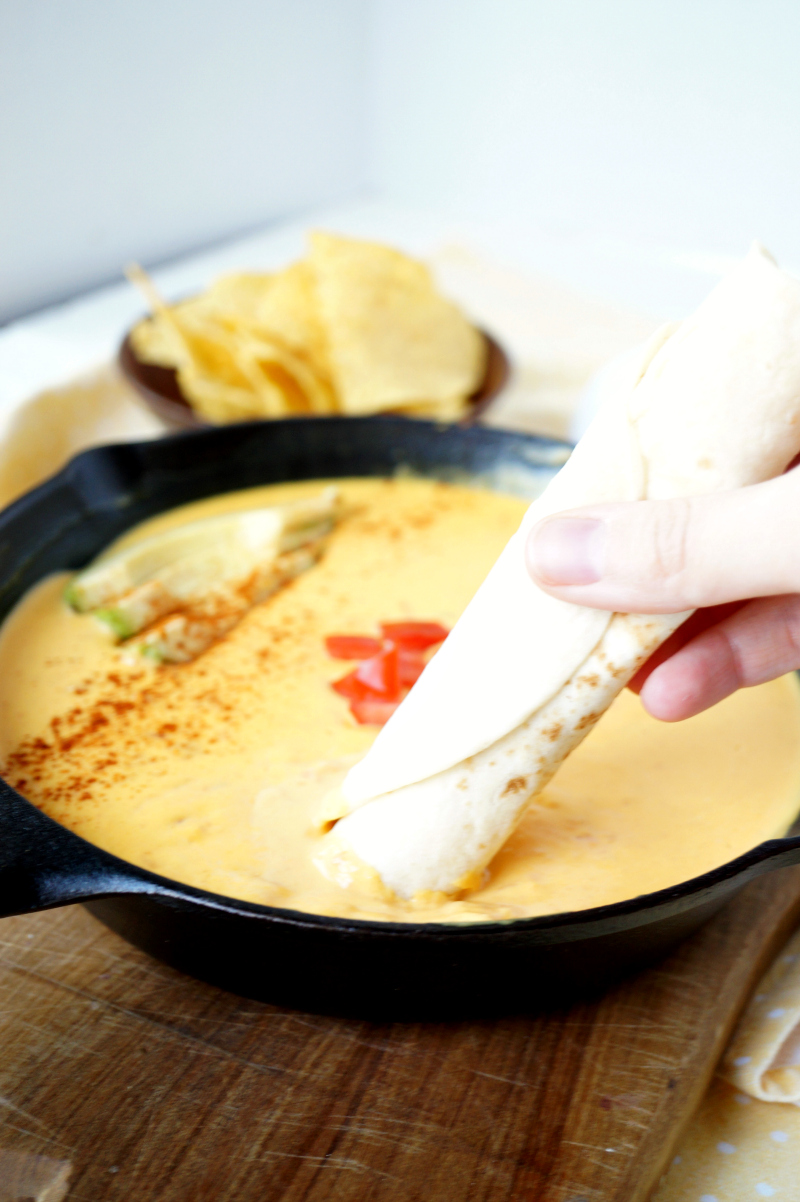
P.S. tortilla chips are great and all... but have you ever tried dipping flour tortillas in your queso? If not, you haven't lived! Promise me you'll try 😉
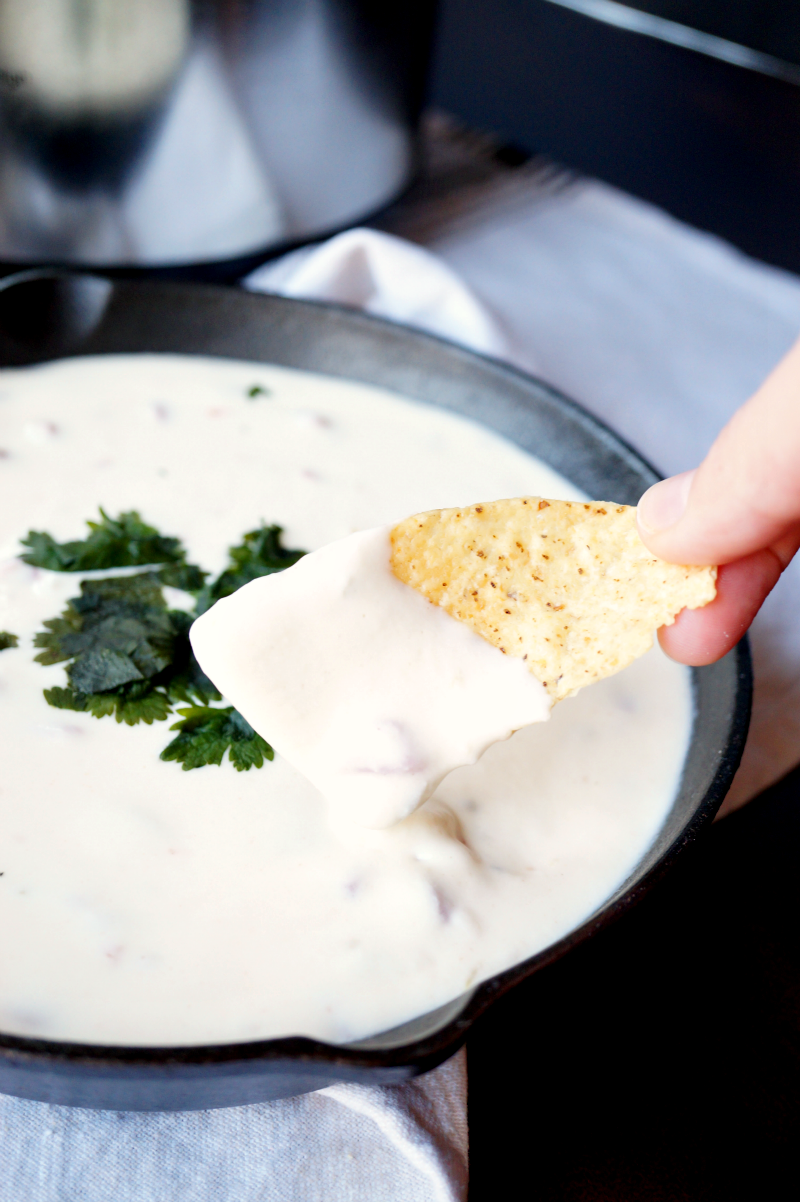
Looking for the White Queso? CLICK HERE!

6-ingredient traditional yellow queso
Ingredients
- 8 oz mild cheddar
- 8 oz yellow american cheese {get it at the deli counter!}
- 8 oz cream cheese
- ½ cup sour cream
- 1 10 oz can original Rotel tomatoes & chilies drained
- 1 teaspoon paprika
- 1 teaspoon garlic powder
- 1 teaspoon onion powder
- ½ teaspoon chili powder
- 1 teaspoon turmeric {optional}
Instructions
- In a medium pot set over low heat, combine all the ingredients.
- Allow them to melt, stirring often, until smooth and creamy. This should take 15-20 minutes. Be patient!
- Serve immediately, or transfer to a slow-cooker with a "warm" setting to keep it smooth and melted. Enjoy!


chris says
making it now. going to put it on chicken and potato burritos with lettuce and tomato.
Ashley says
Do you shred the cheese? Ask for a block ?
valentina says
Hi Ashley! I just cut it into cubes but you can shred it if you want, that will help it melt faster!
Brenda Atwood says
I'm having a taco bar for Easter on Saturday (early). I plan to make both your white and orange/yellow queso sauces. Please let me know if making ahead 1 day will be ok or if its best not too.
Thank you,
Brenda
PS You seem to be a very kind an understanding blogger. I like how you reply to others 🙂
valentina says
Thank you so much, Brenda! I so appreciate your comment 🙂 So I think prepping a day ahead would be totally fine! I would just say to be ready to add some milk to thin it out as it does tend to be thicker after a day or two in the fridge. Let me know how it works out for you!!
Jennifer says
Personally I feel like if I make it all the way the day before it tastes different it's hard to describe.
I usually cut and prep everything for parties, I gather all ingredients and measure them out, I put them in a small container, and into the fridge that way I just dump it into the pan and heat and it's ready to go! For this recipe I would get both cheeses at the deli counter and get them to cut them for me. I'd break them in half or cut them into fourths that way they break apart faster. All the other ingredients would be bagged and together the night before that way there is no time wasted looking for an ingredient to measure. I do this often and for multiple events and holidays, it allows me to cook a full thanksgiving meal the day of with ease!
Tonya says
I followed the instructions and the dip is good but for some reason it's a little chalky. I was wondering if you could help me understand what I did wrong, I'm sure it was me...?
Roianne says
I made the queso and love the taste; however, it is really thick and stringy so have added some half and half (not milk) to keep it Keto. Any suggestions other than adding more half and half to make it more creamy (like the picture)?
valentina says
Hi Roianne! If it is really thick and stringy it may just need to be heated for longer! I find that it tends to be clumpy and have a weird texture right up until it is completely melted through and smooth. The half-and-half is a great idea too!
Emily says
How many cups does this queso make?
Susan says
Sounds delish! Could I sub Pepper Jack for one of the cheeses? (Trying to use up what I have on hand!)
Thanks!
Susan
valentina says
Hey Susan! You sure can. I would do a blend of pepper jack and American cheese (if you can find it) for the smoothest texture 🙂
Samantha says
Can I just put all the ingredients in a crockpot for the yellow like you did for the white?
valentina says
Hi Samantha! You definitely can, but it takes a while for it to melt in the crockpot by itself. I find it faster to melt it on the stovetop and then transfer it to the crockpot to keep it warm and melted!