
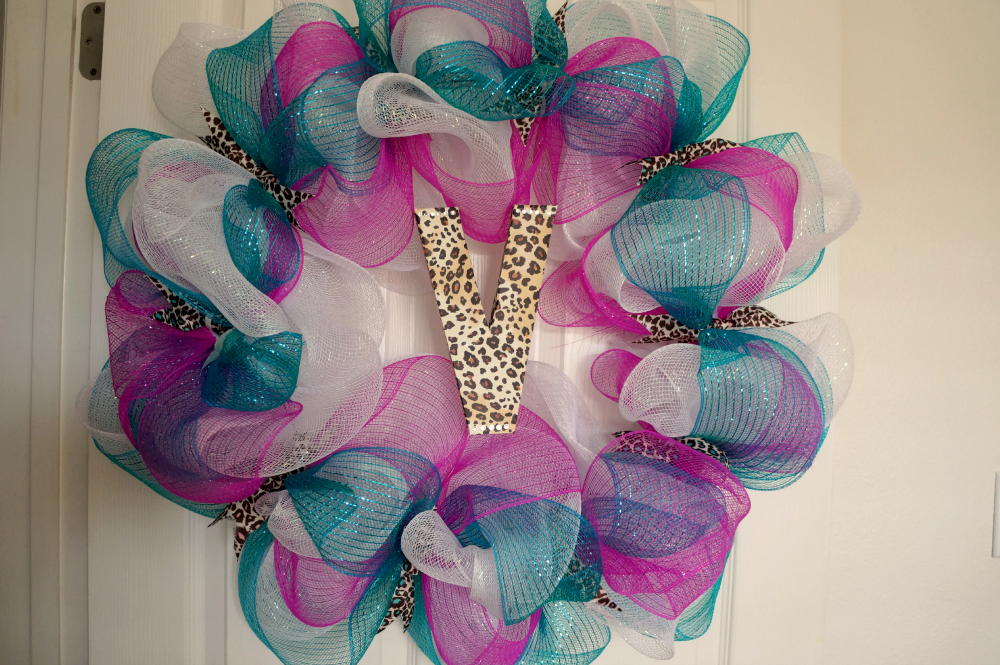
Happy Sunday night! Tomorrow is Labor Day, but for some reason my school decided it would be a good day to start school. So, while everyone else is enjoying a 3-day weekend, I'll be... enjoying class. Hmph. I'd be lying if I said I wasn't at least a little bummed out about it. BUT, since this was my last free, homework-less weekend, I had to do something fun! And by do something fun, I mean make a wreath. If you've been around long enough, you might have noticed I have a slight, small, totally not problematic wreath addiction. This is the FOURTH wreath tutorial on this site, so if this one doesn't float your boat, well... another one on here probably will. Let me show you how to make this big, puffy, fluffy, totally obnoxiously perfect wreath!
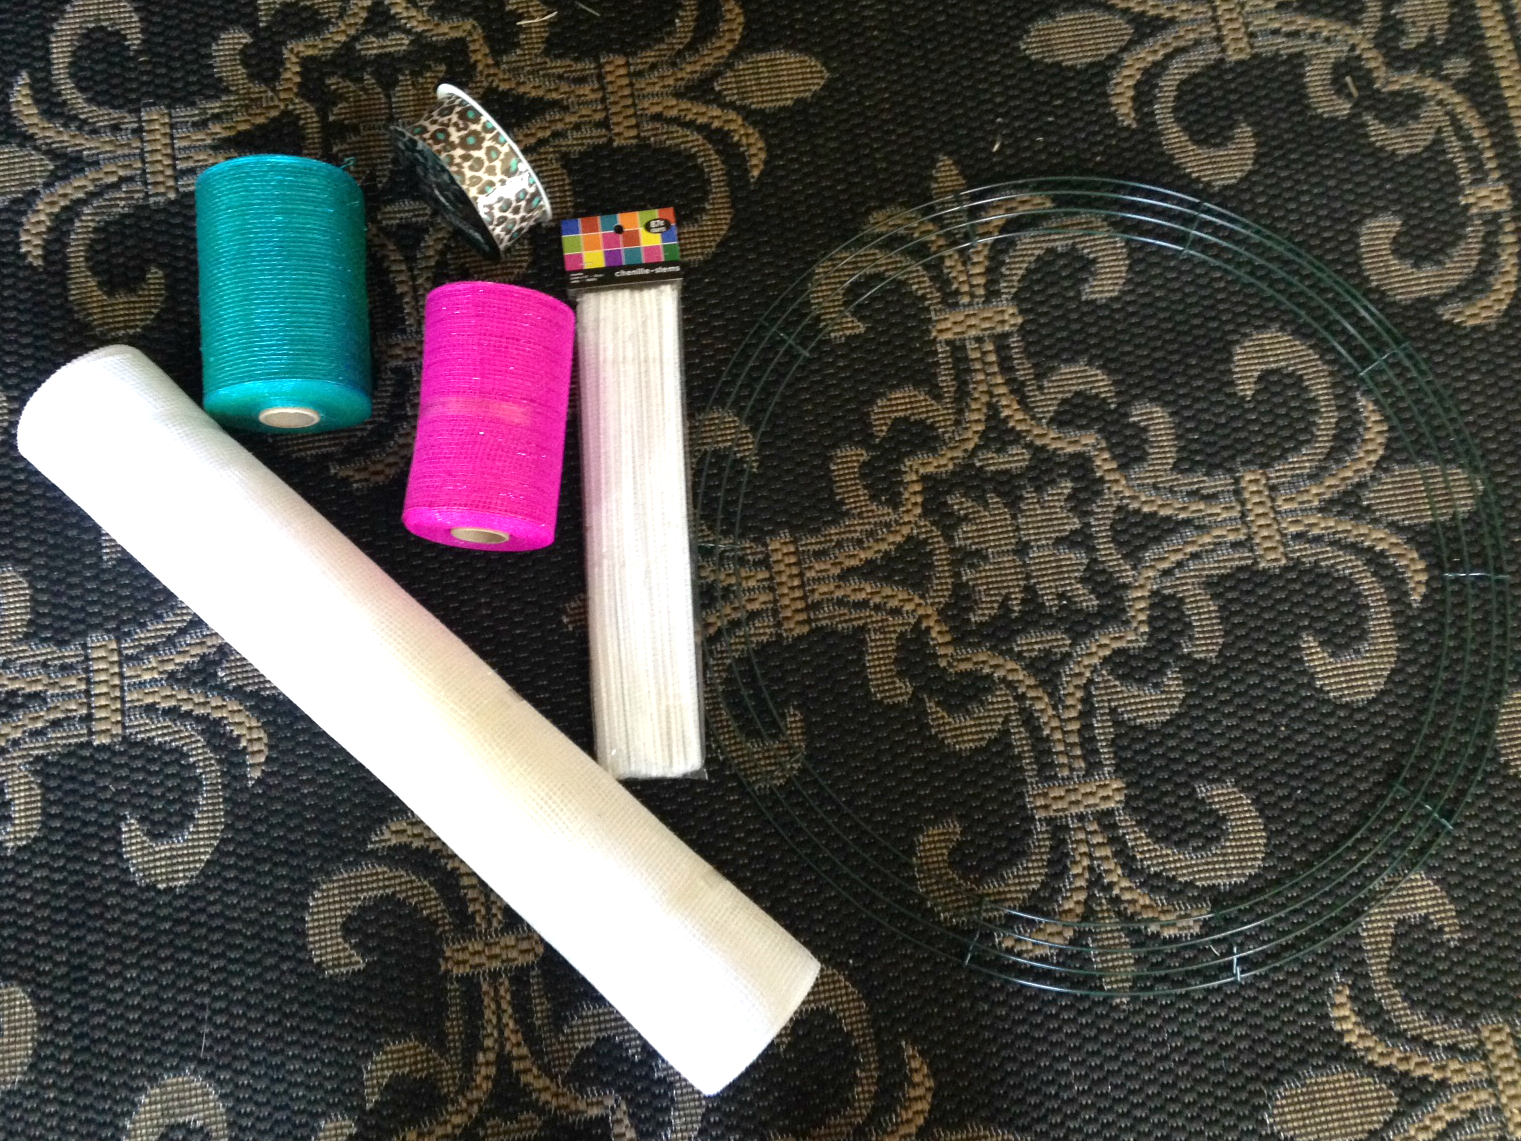
Here is what you need: (please note that NOT EVERYTHING is in the picture!)
- 1 metal floral wreath form (you can find these in the floral section of craft stores)
-1 large floral mesh roll
- 2 small floral mesh rolls of different colors
- pipe cleaners in the same color as your large roll
- 2 rolls of ribbon
If you want to add an initial in the center like I did, you will also need:
- 1 hollow cardboard letter
- 1 sheet of scrapbooking paper
- ModPodge or white glue
- fishing wire
So, let's get to work!
If you were to say, "Wow, Valentina, your step-by-step pictures are actually totally awful this time," I would respond, "Yes, I know, that's because I wasn't planning on blogging this." Oops. But now you know.
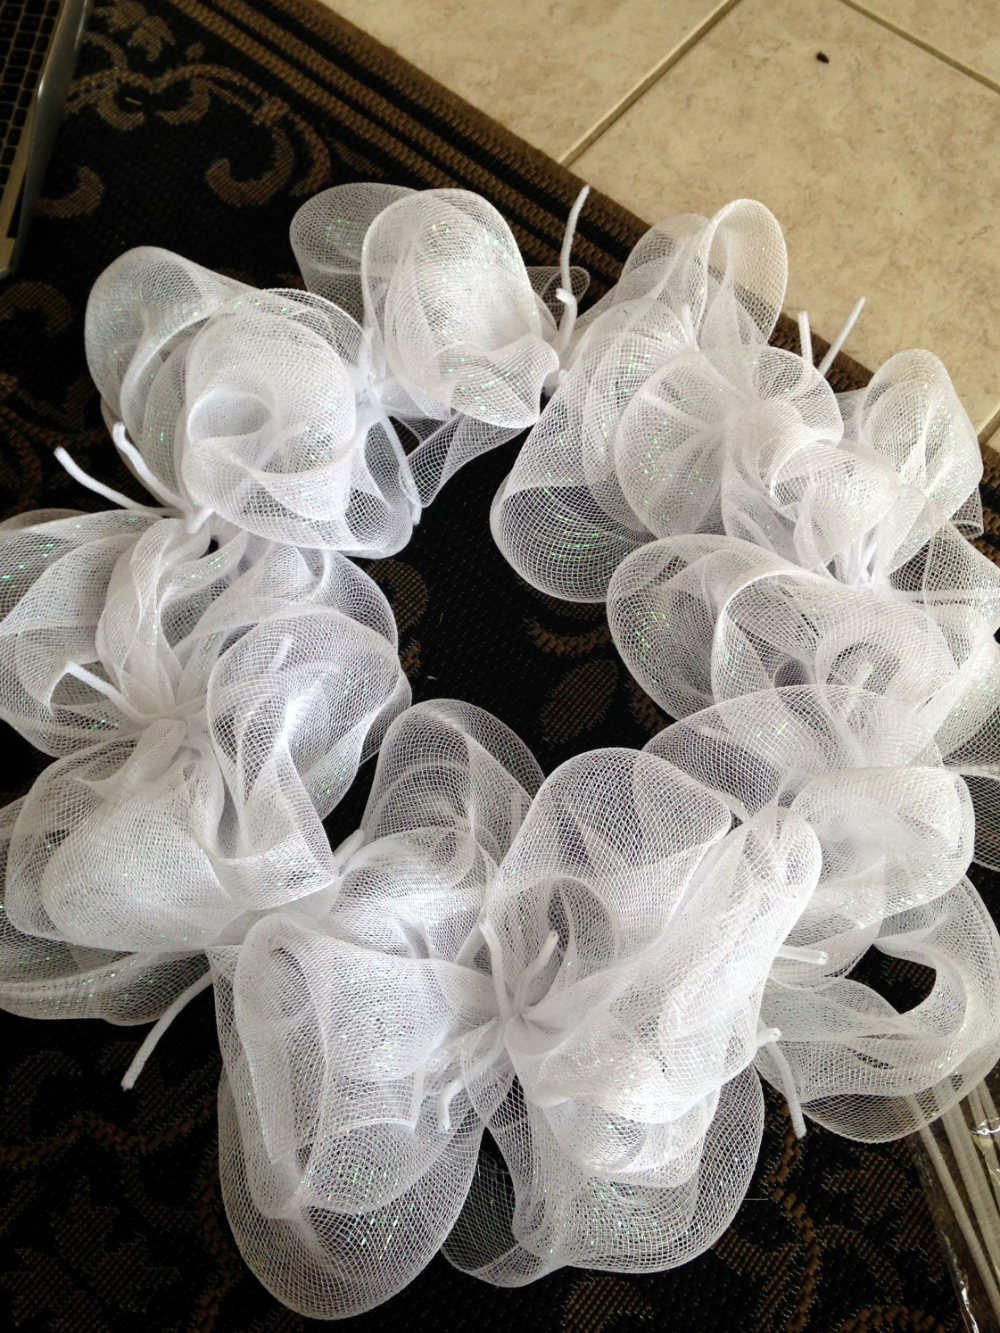
1. Grab your pipe cleaners, and place + twist in even intervals on your metal wreath form. There are usually three "rings" in a wreath form, so put a pipe cleaner on the innermost ring, twist it once or twice to keep it in place, and place one in the same position but on the outermost ring, also twisting. I used 20 pipecleaners total.
2. Grab your large mesh roll, and pick a place on the outer layer of the wreath to start. Make a small "poof", and secure it with a pipecleaner, and repeat until you have gone all the way around.
3. Once the outermost layer is finished, move to the innermost layer and repeat.
4. If you still have mesh left at this point (which you should!), create a layer in the center, and secure it using one strand from a pipecleaner in the inner layer and one strand from the outer layer. This middle layer can be flatter and less poofy than the edge layers. Keep going until you are out of large mesh.
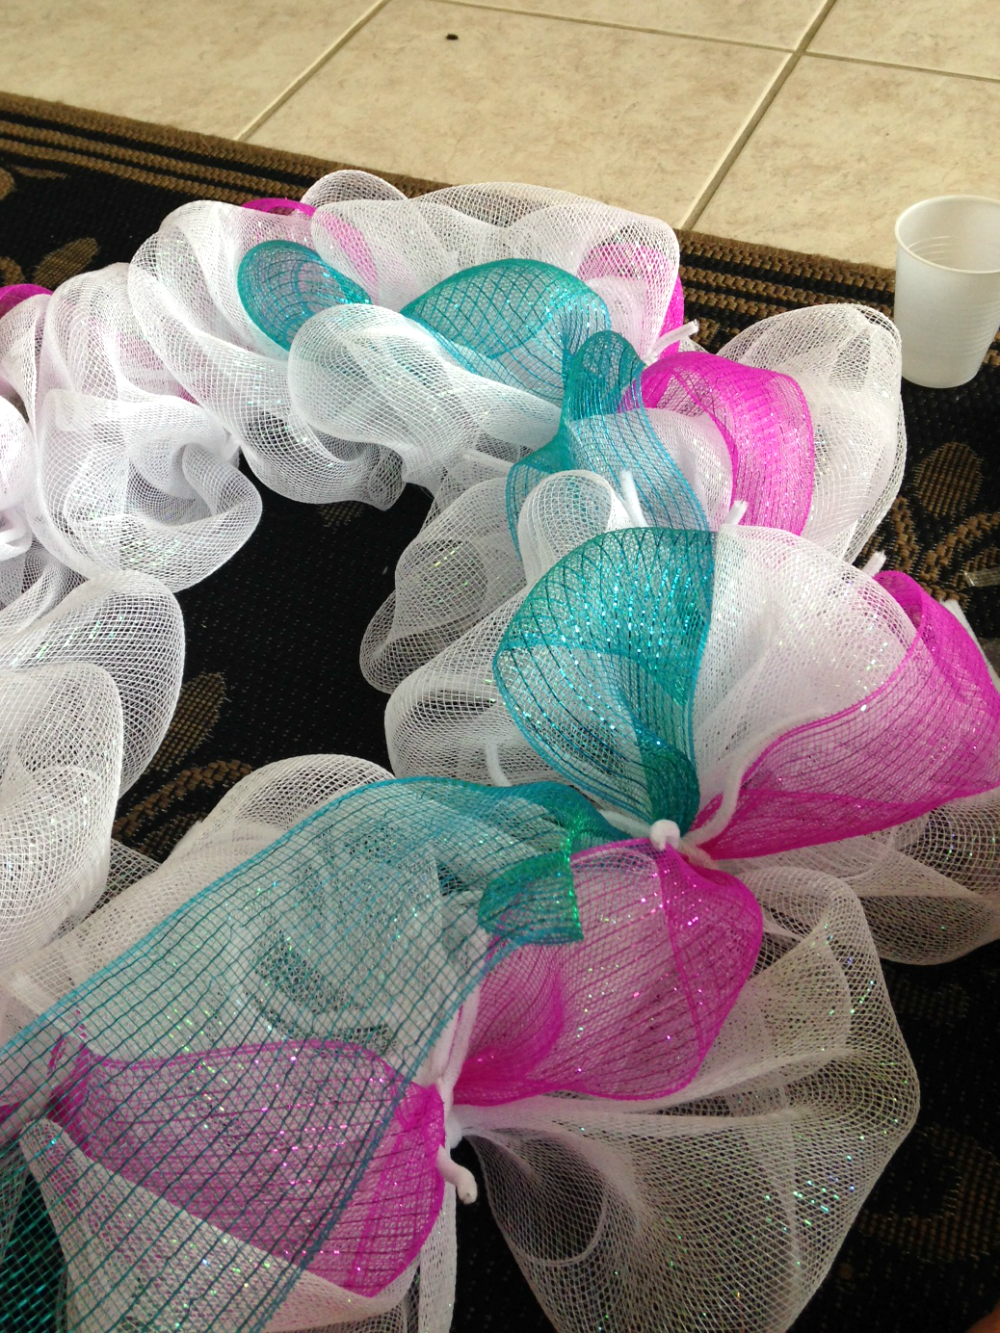
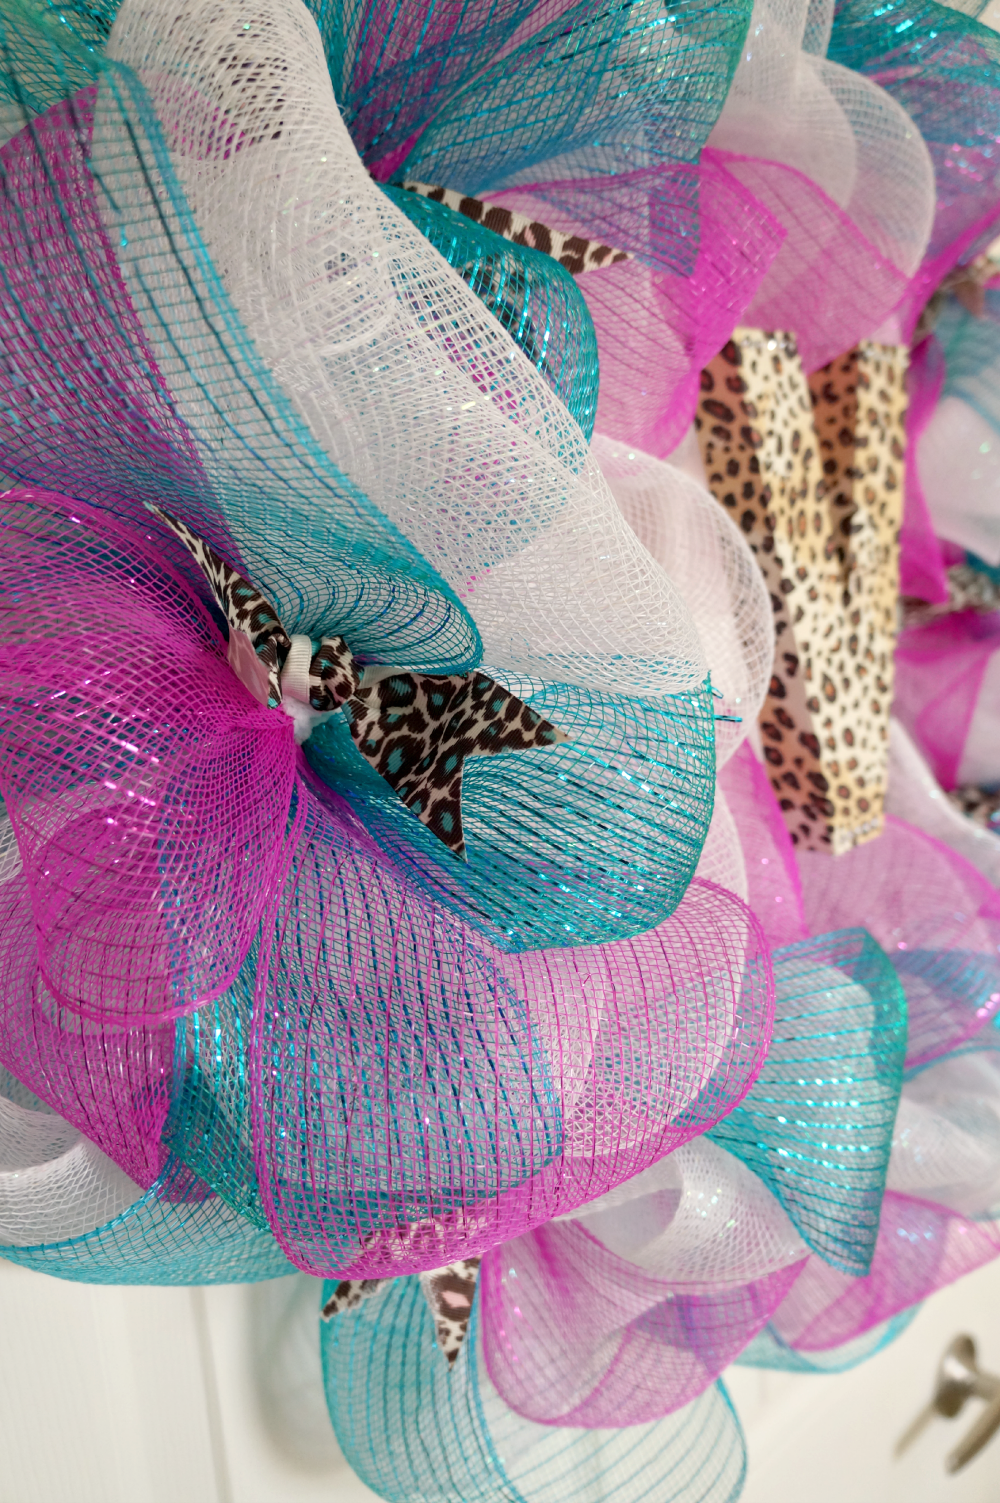
5. Now, choose one of your thin mesh colors. Going along one of the existing "main" chains of mesh, create a little volume and secure as before. These contrasting colors do not have to be as poofy and voluminous because we are no longer trying to create a base for the wreath. We are just decorating at this point. Pick a starting point, and make one full circle, securing with the pipecleaners as you go. Cut the mesh when it's complete.
6. Now, repeat once more with the same color, and two times with the other accent color. You want to have two circles of each contrasting color!
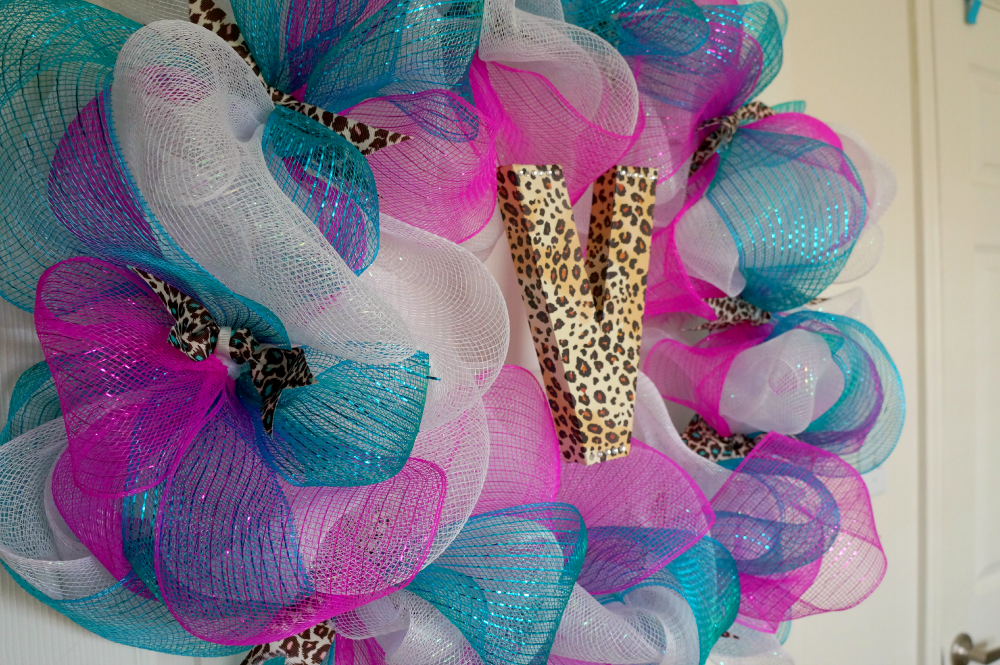
7. Now it's time to add the ribbon. You can use two rolls of the same kind, or two different ones. Keep in mind that different ones will have to be alternated! I simply tied and knotted mine where the pipecleaners were so I could cover them up. Once you do this, your wreath is complete! But, if you want to add an initial in the middle...
8. Get your cardboard letter, and trace its outline on the scrapbook paper. For a more seamless look, also trace the sides, top, and bottom of the letter (so that the paper will have to be folded around the letter rather than cut and re-glued together). Cut along the outermost lines, and fold along the inner lines. Cover the surface of your letter with ModPodge or glue, and place the paper on top and around the sides.
9. Once your letter has dried completely, use tape and a small length of fishing wire to attach it to the wreath... this was the only way I could think of for the letter to hang in the center!
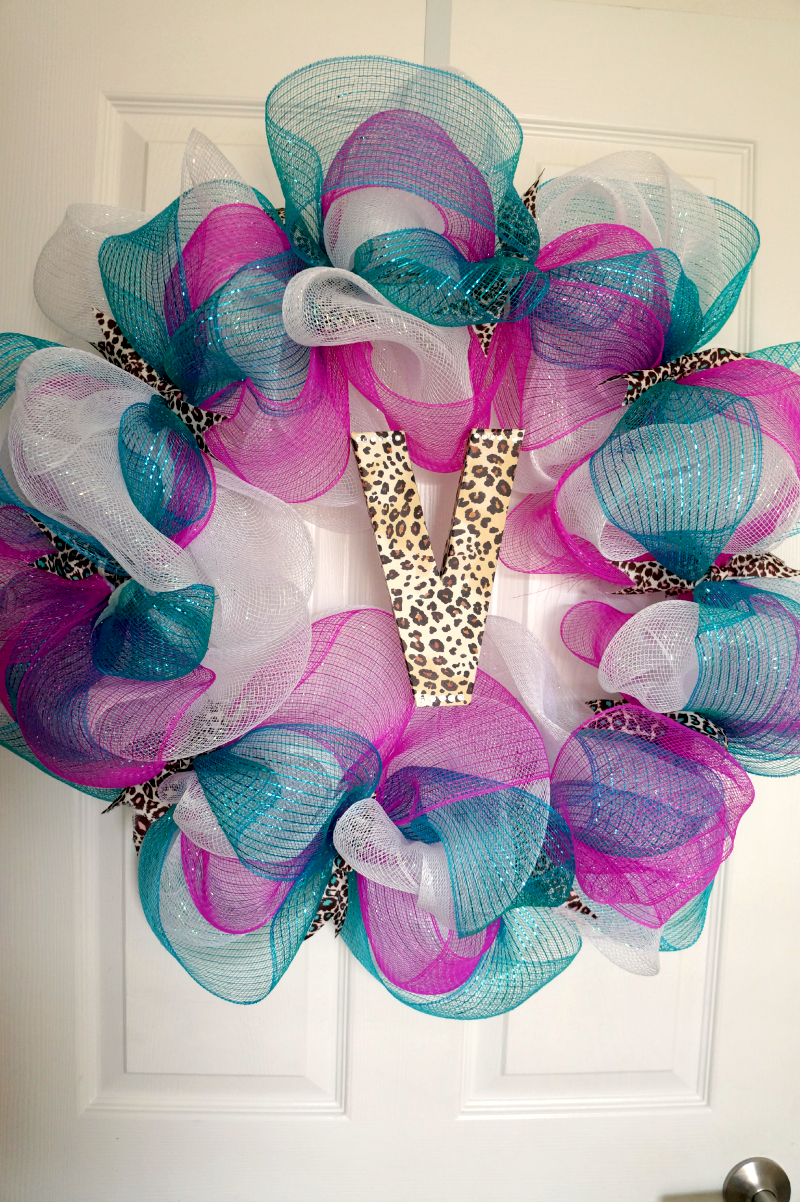
And you are DONEEE! I apologize for how wordy this post is, it's seriously hard to describe things when you don't have a picture! If y'all have any questions, please don't hesitate to ask. I know this description can be a little confusing. Good luck and happy crafting!


Leave a Reply