
Once upon a time, I got the opportunity to make some fun graduation cakes! Four, to be exact. And, being the completely insane person I am, I accepted... all of them. Did I mention they were all for the same day? OH. Yeah. Insane, indeed. The bad news is that they took me 3 days from start to finish and I didn't have any time to blog or photograph or sleep. The good news is, they all turned out aweeeeesome! Two are fondant-based which, if you know me, you know that me and fondant are frenemies at best {and mortal enemies at worst}. I was surprisingly pleased with how well the fondant worked this time, however! It's really true that the only way to improve is to practice, practice, practice. I'll give you some tips in this post, so you too can conquer your pesky fondant nightmares 😉 Let's get to work!
The first, and MOST important tip, is you need to roll your fondant thick. Seriously. Thicker than you think you will need. Fondant is a little b-word in the fact that as soon as you pick it up to transfer it onto your cake, it stretches like nobody's business. So if you rolled thin, it will start to rip and crack as you place it on the cake. And guess what? Once buttercream gets on that fondant, good luck trying to take it back off and replace it. It ain't gonna happen. Bottom line: roll that sucker thick!
Another really important thing I've learned as I work with fondant is keep it moist! It needs to be an almost PlayDoh-ish texture as you knead it and roll it. If it cracks or feels dry as you're working it, you can bet it will not cooperate when it comes to transfer. Sometimes I even use a water sprayer to add extra water to storebought fondant because it's just so dry to begin with. The upside to that, however, is if you have any leftover fondant from a previous time that got a bit dry, you can almost always bring it back to life with a bit of water. But seriously, only use powdered sugar when you're rolling, and use as little as you can. Dry fondant = bad fondant = angry baker. Trust me.
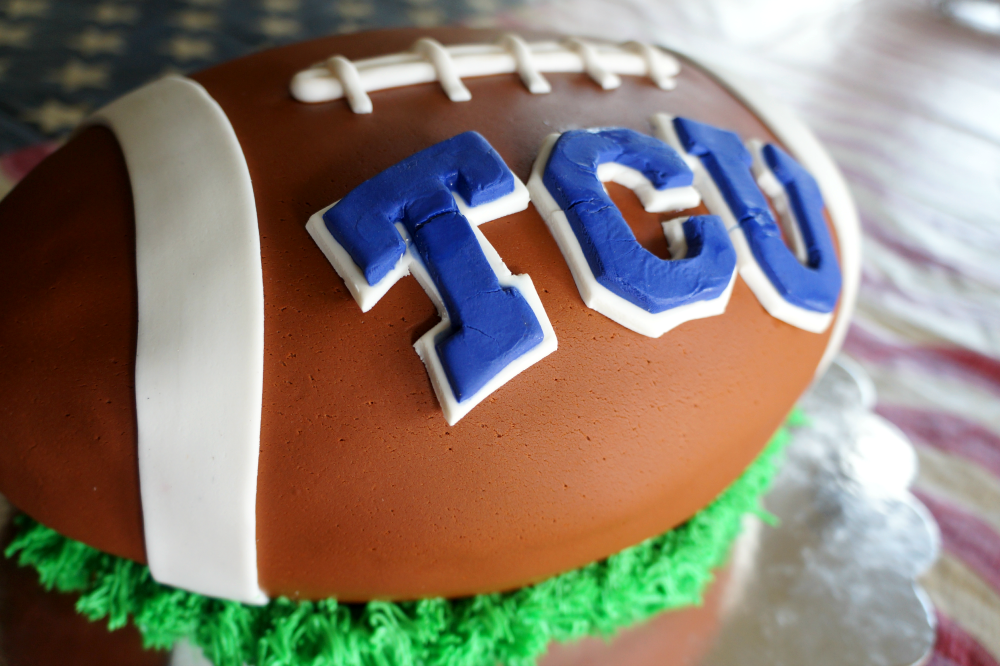
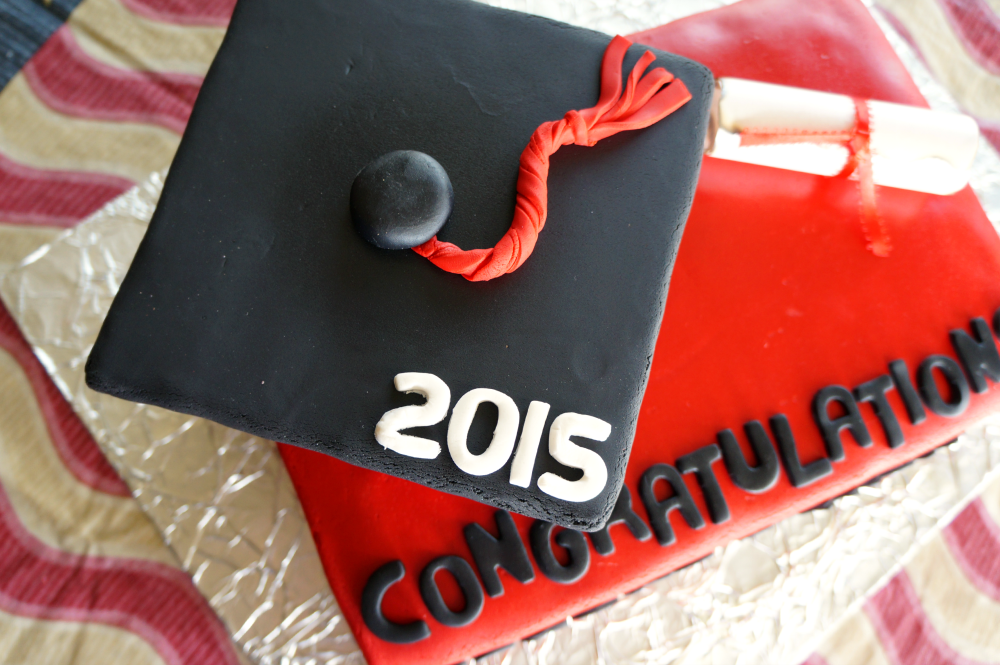
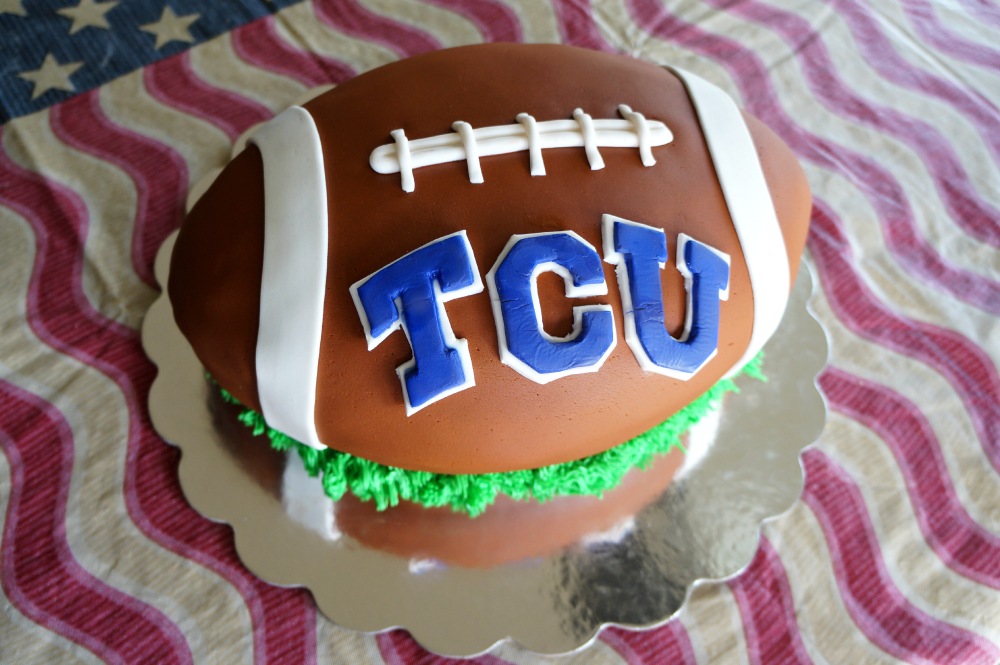
Here's the thing. It's good to make fondant decorations ahead of time. Smart, even. However, please remember that unless you're putting said decoration on the top of the cake or some other surface that is totally flat, that little fondant devil will crack. Sigh. In other words, don't be me. I didn't think about the fact that my football was obviously not a flat surface, so the TCU logo cracked a bit. Not the end of the world of course, but definitely frustrating! -insert tears here-
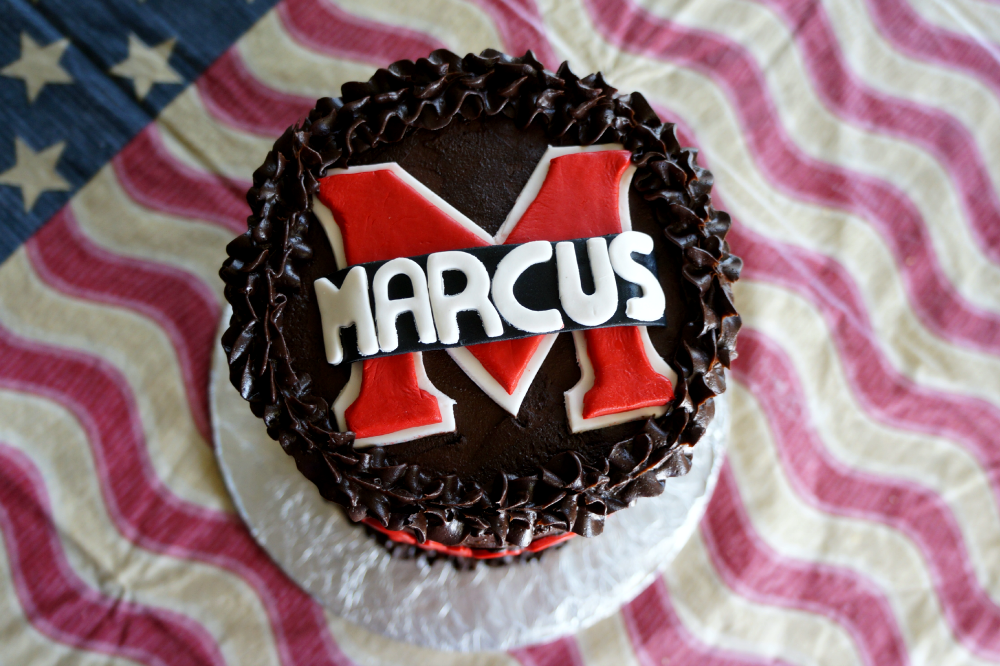
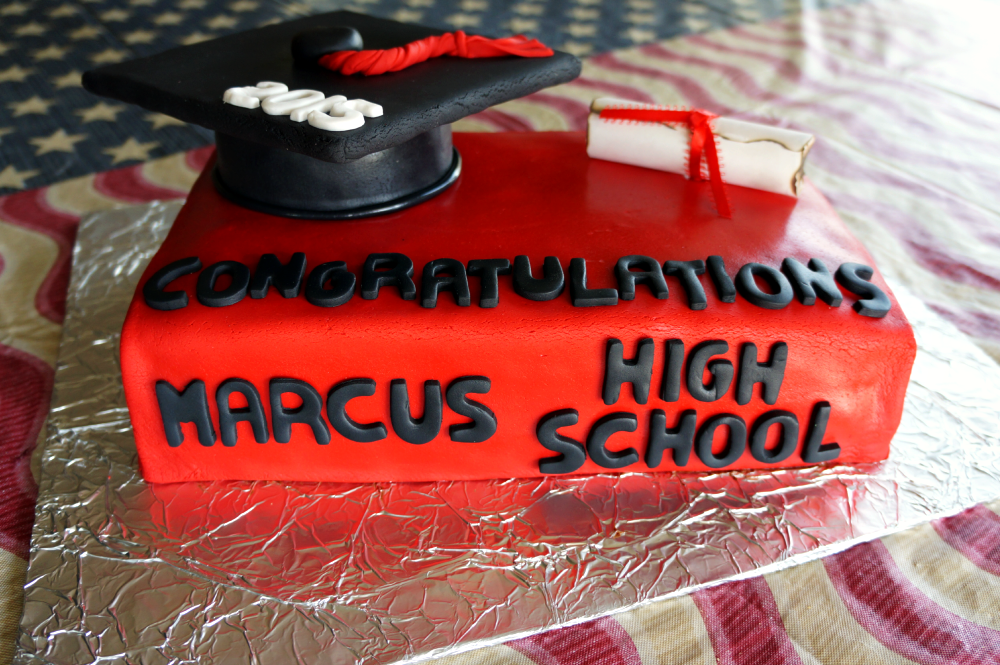
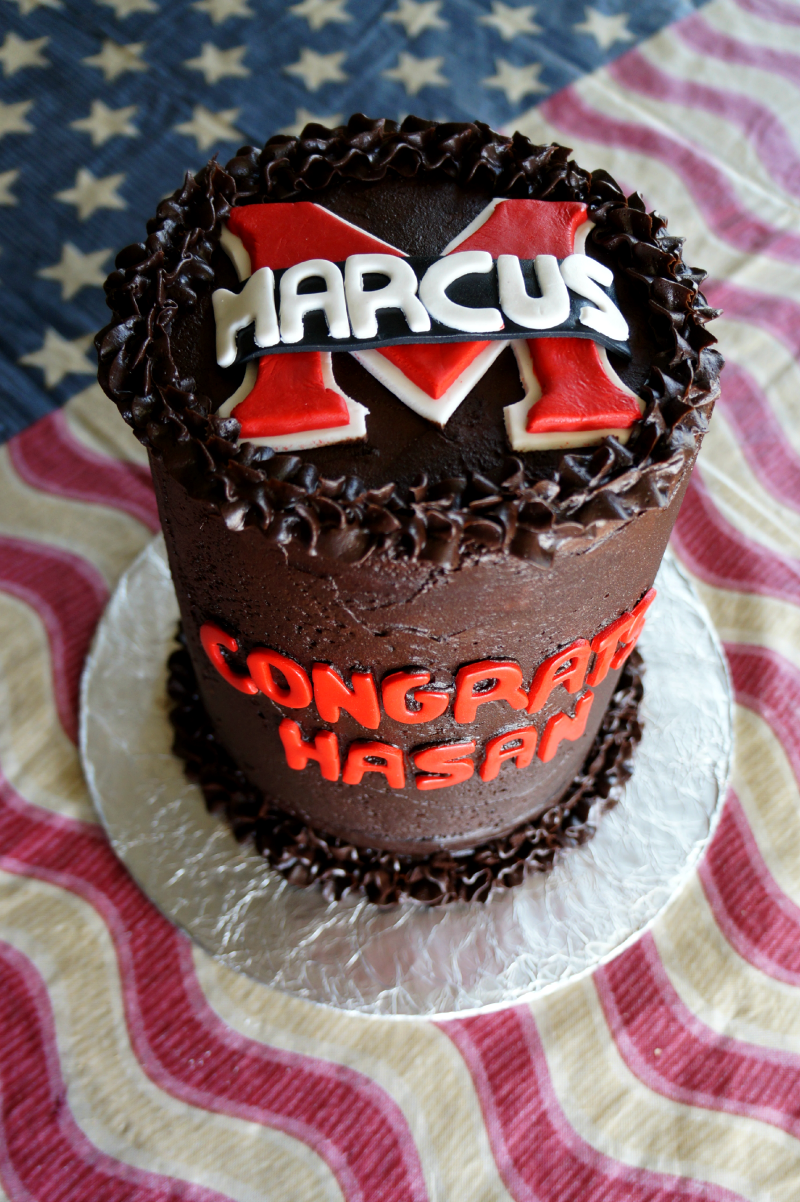
In this case however, the fondant went on the top of the cake so no cracking involved! Hurray! As you can see, this cake is covered in buttercream and just has fondant decorations. If you're the kind of person who would rather stab themselves in the eye with a fork than cover a whole cake with fondant, this is a good compromise. You can have the creative freedom of fondant, but a lot less stress and a lot more easy buttercream piping instead! While we're on the subject of fondant decorations... cutters are your best friends. Cookie cutters or fondant-specific cutters, it doesn't matter, but they will make your life sooo much easier. All those tiny letters on the book? Cutters. I had to hand-cut the TCU loco and the background red and white M for Marcus, but I thankfully had cutters for the small letters, which would have been nearly impossible to cut neatly by hand. Trust me. Cutters are fantastic.
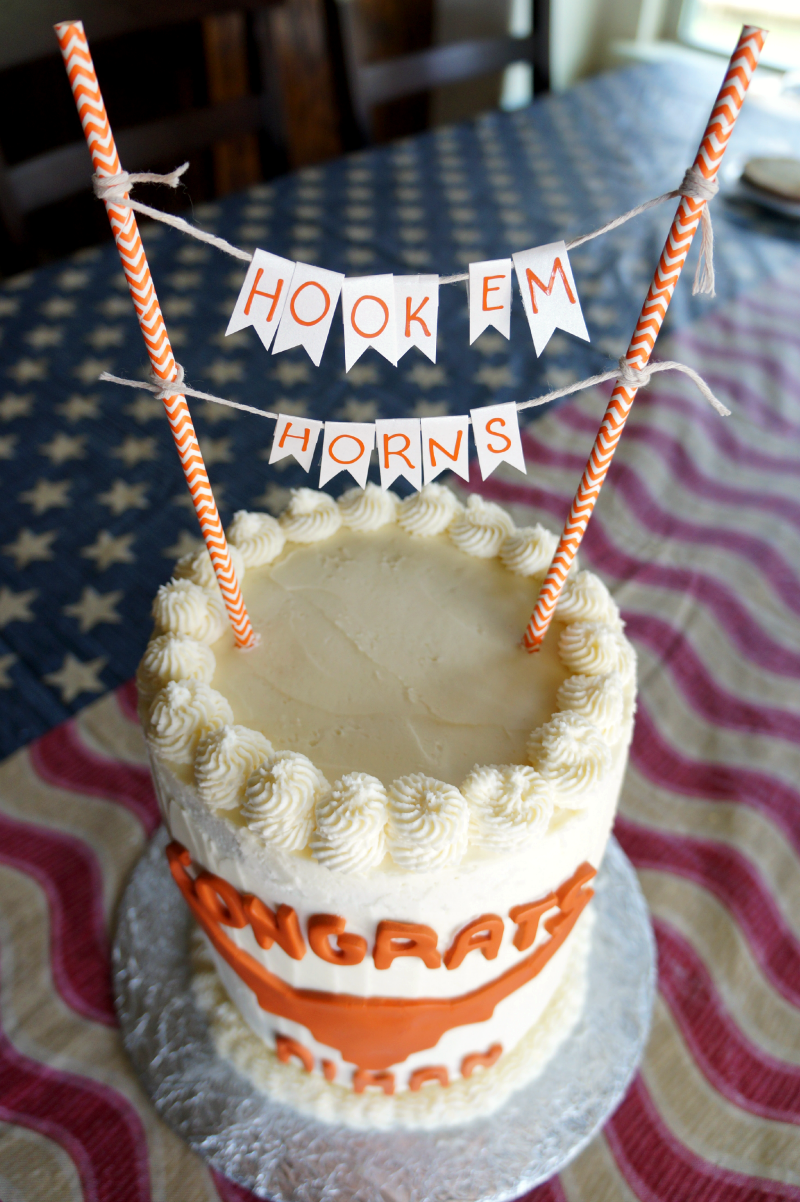
This longhorn? Also a cutter. As an Aggie, I'm not quite sure how or why I happened to have a GIANT 5 inch longhorn cutter, but it came in handy so I'm just not going to question it 😉 Now, let's talk FOOD {finally!}. The book cake was made using a big rectangular pan, which I then cut in half and stacked to make book smaller and thicker. I used THIS chocolate cake recipe, but omitted the peppermint obviously. Easy peasy and it always comes out perfect! The filling and frosting was this easy peasy chocolate buttercream. Again, simple and yummy. The football cake was made using two Wilton football pans and sandwiching them together using the same buttercream recipe.
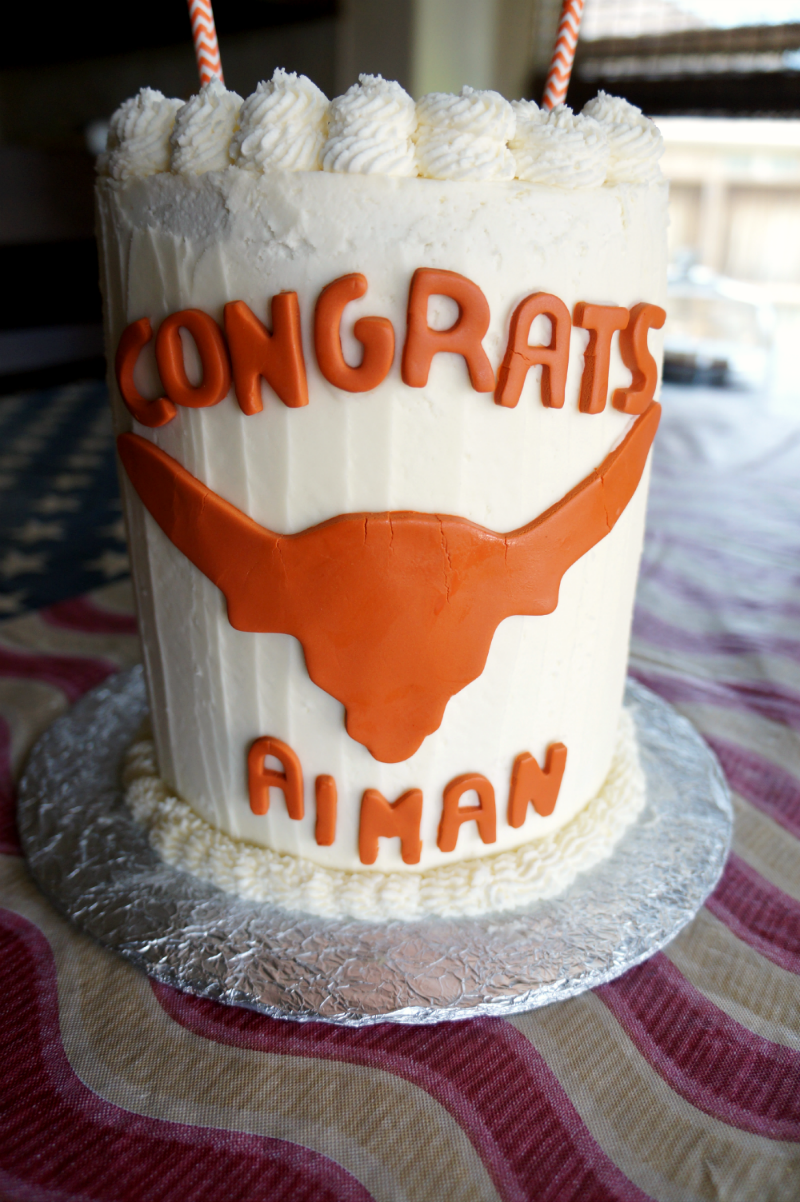
The tall and skinny Marcus cake was ALSO made using the same chocolate cake {can you tell everyone loves chocolate?}, but the filling was a raspberry chocolate ganache. The outside frosting was still the same good ol buttercream. Finally, this longhorn cake was not chocolate! The cake base was vanilla, and filled with pastry cream and fresh strawberries for a strawberry shortcake layer cake. Yum! The frosting for this was just classic American buttercream made with powdered sugar and butter. Easy peasy. Both of these tall-and-skinny cakes are made of 4 layers of 6-inch round cakes.
Well, this is all I can think of! I am by no means a fondant expert, but I hope that these trial-and-error tips will help you when decorating your own cake! If y'all have any more questions, I will be more than happy to help. Happy baking! 🙂


Leave a Reply