
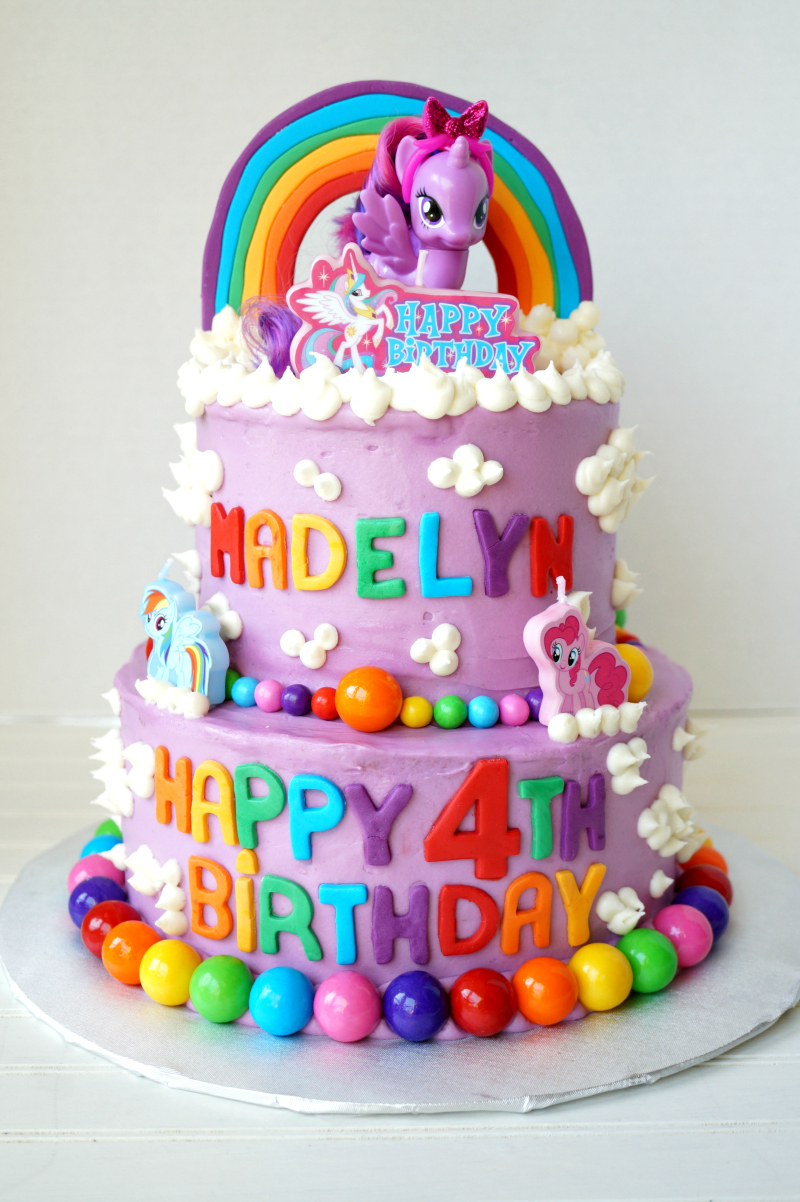
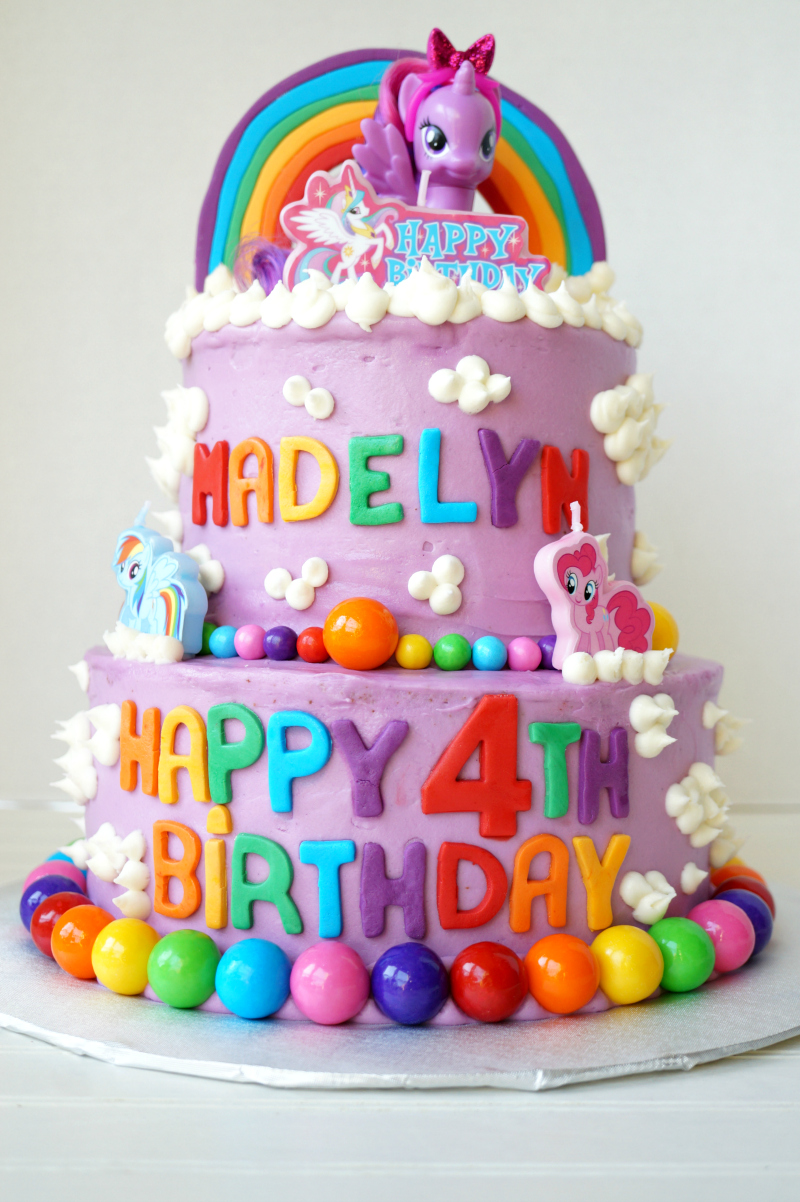
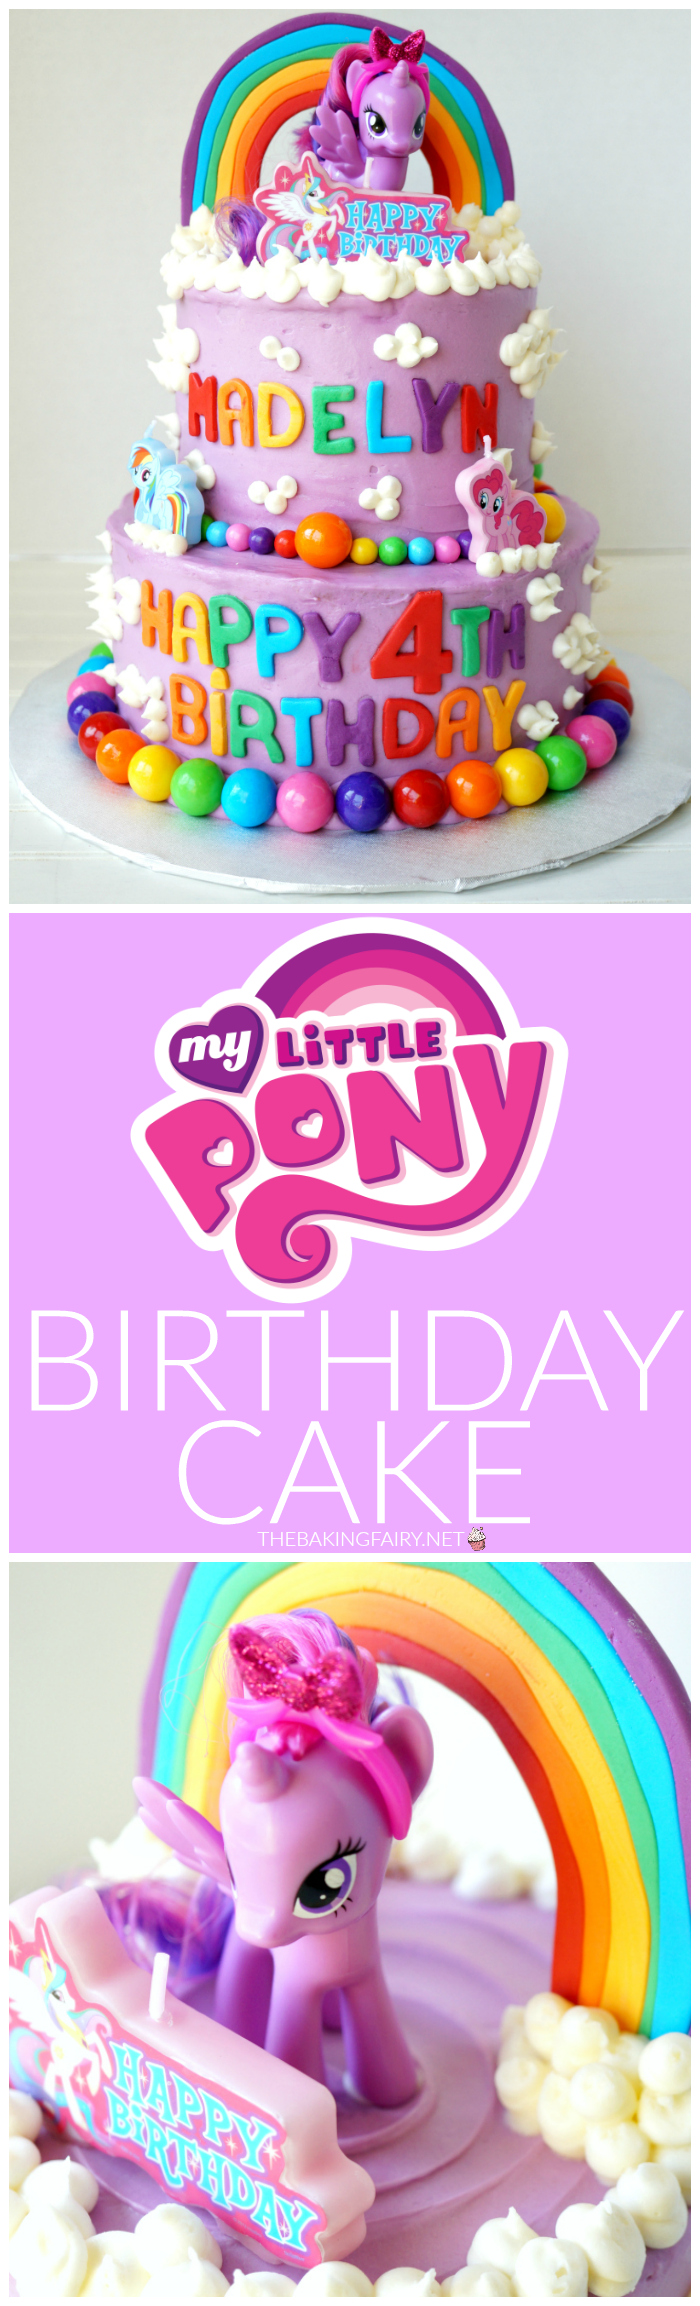
Make any little girls' birthday magical with this My Little Pony tiered cake! It's covered in rainbow letters, gum balls, chocolate candies, and topped with a rainbow and a pony!
Happy Monday! This is my first real day back to school after my hefty 2-week summer break {I kid you not}, so I figured we could all use something fun and cheery to start the week. This My Little Pony Tiered Birthday Cake is basically what every 4-year-old's dreams are made of. And mine too, if we're being honest. Like yes, I absolutely love making wedding cakes... they're so gorgeous and sophisticated and they make me feel like a fancy baker. But my true loves are actually little girl birthday cakes. PINK! RAINBOWS! SPRINKLES! UNICORNS! GLITTER! You can't blame me!
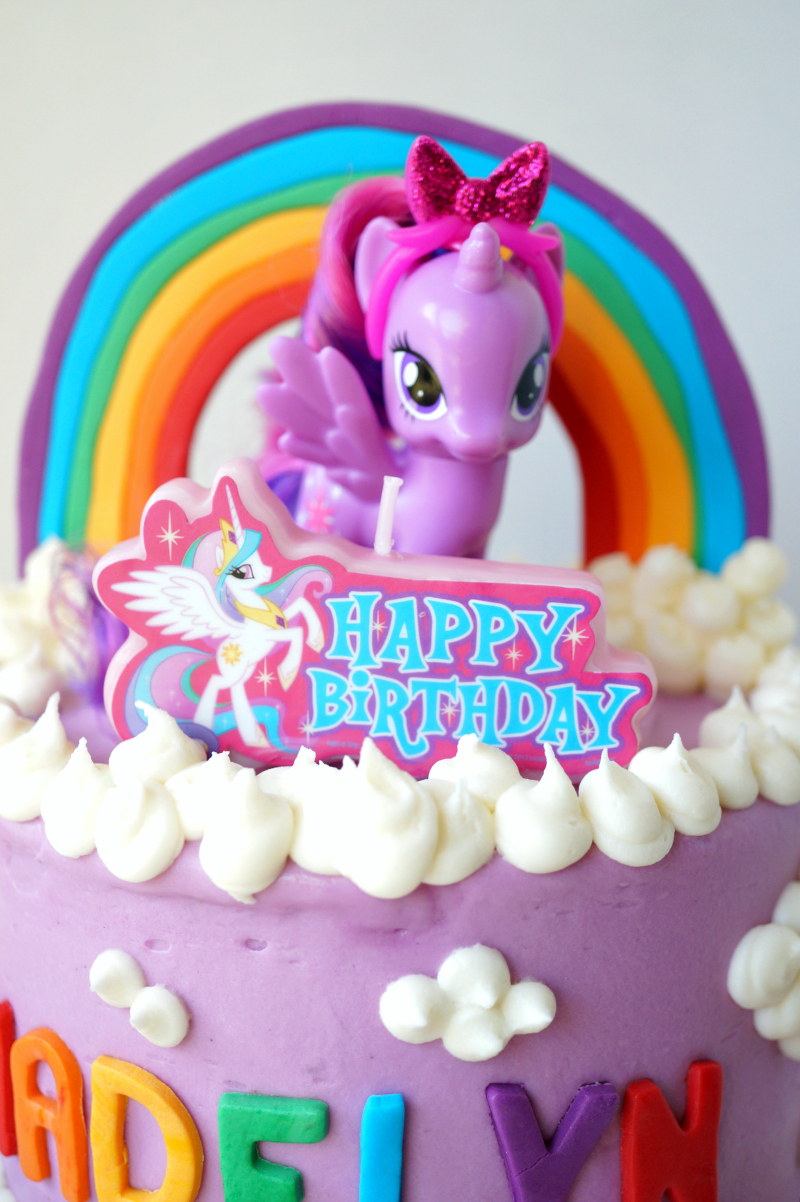
I'm not saying everything is all rainbows and unicorns... but this cake is literally covered in rainbows and unicorns. I'm kind of obsessed. This is just one of several completely adorably obnoxious birthday cakes I've made, and I seriously love each one more than the last. The My Little Pony glitter bomb that we have today features two 8-inch marble cakes and two 5-inch marble cakes, sandwiched and slathered in purple cream cheese frosting. They're decorated with rainbow fondant letters, and topped with an actual rainbow fondant. The white frosting is just my basic, 5-minute American buttercream piped to look like fluffy clouds. TOO STINKIN FUN.
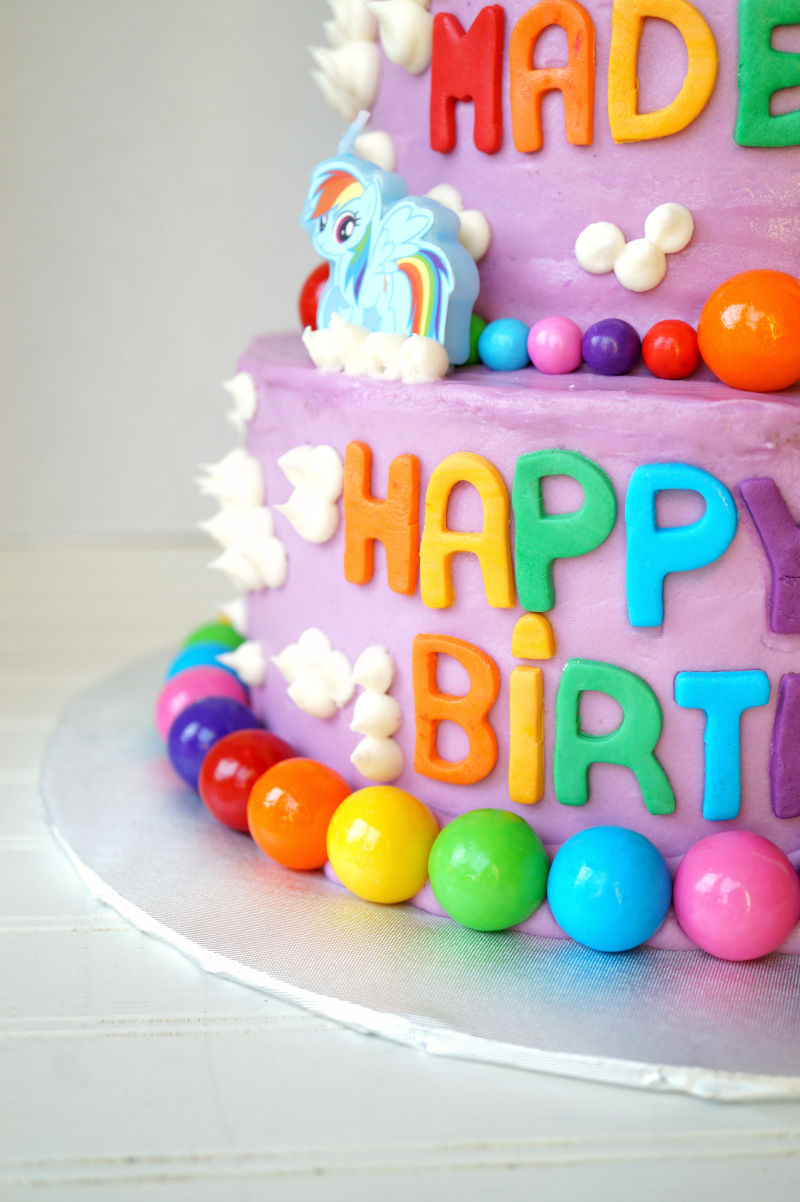
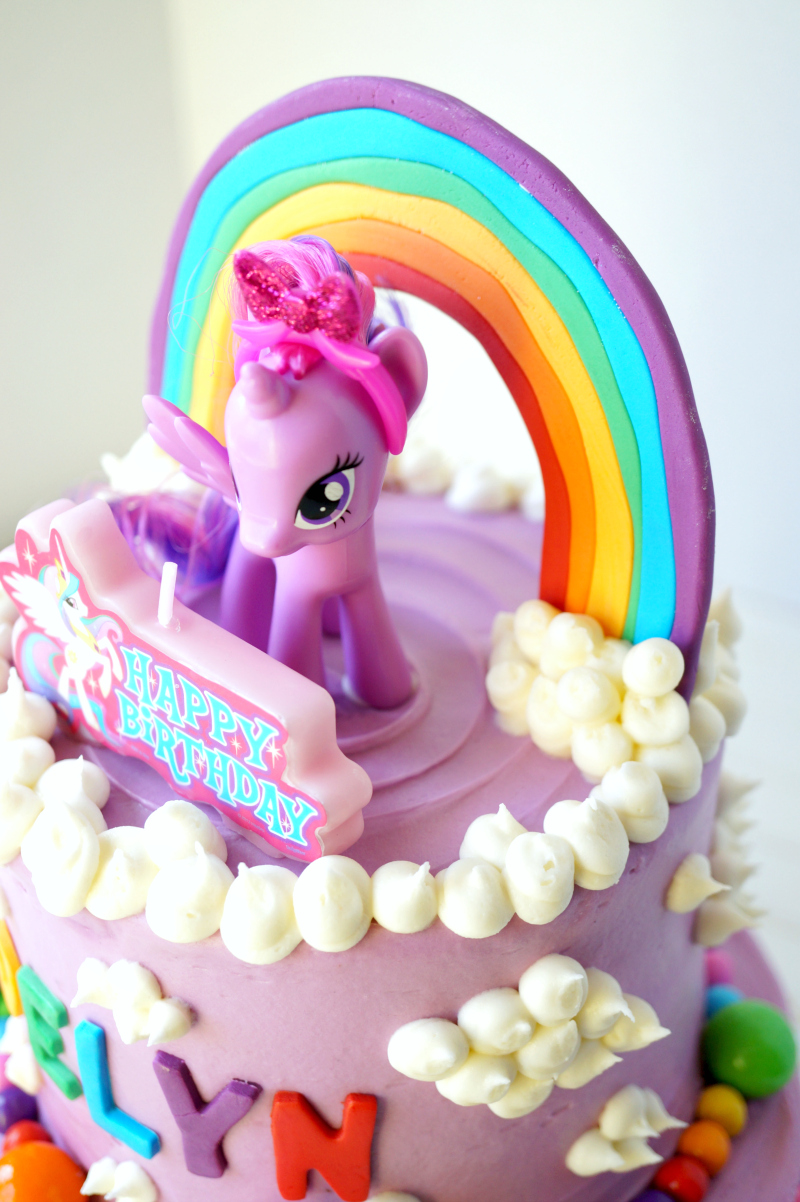
Did you know that Party City will sell you individual gum balls in any color your heart desires? And they're 15 for ONE DOLLAR?! Same with tiny sleeves of Sixlets. So convenient! That's what I used for the rainbow candies and it ended up being SO easy. This is definitely not sponsored, but I figured I'd share the knowledge for other cake decorators out there! 🙂 As for the fondant, I always buy it by the bucket {no literally, it's a five pound bucket} at Hobby Lobby. It's plain white and I can color it whatever shade I need! You can also make it homemade, but for small projects like this where the fondant is just an accent, I really don't find it to be worth the time. The birthday girl's mama bought the My Little Pony figurine and My Little Pony candles, but I'll leave you an Amazon link below in case you want the same ones! Aaaand... that's really it! If you have any questions or you're attempting to make the cake yourself, as always I'm happy to help 🙂 Happy baking!
*Disclosure: I am part of the Amazon Associates Program, and there may be affiliate links on this page. If you buy anything through my website, I will receive a small percentage of the profit at no extra cost to you. Thank you for supporting my blog!*


Lisa @ NatureImmerse says
Beautiful cakes everyone! You're all very talented.
Adina says
I love making fancy wedding cakes and funny children's birthday cake as well. Your pony cake is absolutely gorgeous, I will keep in mind for the first girl who likes ponies. 🙂
Elaine Mitchell says
Hello Valentine my name is Elaine I ran across your my little pony cake while browsing online for birthday cake ideas. I am in love with the cake. My daughter turns 3 next month and she's obsessed with my little pony. I want to make this cake for her. I need tips on how to make the rainbow stand up on the cake and also which tip did you use for piping the clouds? Thank you for your time I look forward to hearimg from you
valentina says
Hi Elaine! Thank you so much for your comment 🙂 I'm so glad you like the cake and I would be happy to help! So the rainbow is made of fondant. I made 6 different colors of fondant, rolled them out into thin snakes, and then put them all together to create the rainbow. I then stuck toothpicks through the bottom (I believe 3 on each side) while it was still soft, so when the fondant hardened they were securely in there. As for the clouds I think I used a Wilton #12 tip which is a medium-large round tip but not jumbo. Hope this helps!!!
Elaine Mitchell says
Which cake board size did you use? Also, did you use dowel rods? How did you make the fondant letters did you use cut outs? If so where did you purchase them from?
valentina says
The cakes were 5" and 8" so I used a 12" cake board. I did not use dowel rods but I generally just use long skewers to secure my cake. Just as effective and super cheap. For the letters, I used a set of letter cutters from Hobby Lobby that are cookie/fondant cutters!
Elaine Mitchell says
I want to make the bottom 10' and the top 6' since there will be around 35 people for the party. Would you recommend the wilton 4 count dowel rods?
valentina says
Elaine, I would recommend at least a 12" if not 14" cake board if you plan on making the bottom 10", especially to account for the frosting layers and then all the gumballs around the edge. I have not personally tried the dowels but I have had good results with Wilton products so I trust them!
Elaine Mitchell says
So wilton Tip #12 for the clouds? Do you have recipe for your cream cheese frosting?
valentina says
Yes #12 for the clouds. And the recipe I always use is right here with these cupcakes 🙂 https://www.thebakingfairy.net/2017/02/red-velvet-cupcakes-cream-cheese/
Elaine Mitchell says
Thank you I really appreciate it. I'm going to make the cake the night before. Any tips on how to keep the cake moist and fresh over night for the next day? Should I bake it store it then decorate it the day of the party?
valentina says
I would definitely recommend making it a day or two ahead of time and storing in the fridge! You'll have a few cakes to bake ,and it is so much easier to decorate if everything is cold and firm. I would absolutely give them at least one night in the fridge. You can wrap them in 1-2 layers of plastic wrap and that should be plenty. 🙂
Elaine Mitchell says
Did you add sugar water to keep the cake moist before you decorated it?
valentina says
I usually don't because I forget LOL. You are welcome to! I find that it helps but again I forget most of the time.
Elaine Mitchell says
What did you use to smooth out the icing? I used the icing smoother but it doesn't come out looking like yours. What am I doing wrong?
valentina says
Hi Elaine! I use a cake scraper like this to smooth out the sides of my cakes! OXO Good Grips Multi-purpose Stainless Steel Scraper & Chopper
valentina says
You need to make sure your cake and frosting are cold enough to not be runny. I always run into trouble once the frosting get too warm.
Elaine Mitchell says
I have a scrapper similar to yours also metal. Ok makes sense because i would apply the icing once I make it. So next time I practice I will place it in the refrigerator. To keep it cool. I was getting frustrated because the crumbs were every where when I was drum coating. I guess I'll put in the fridge after Crum coating To keep cool for 10-15 minutes then take it out and put the cool icing on it?
valentina says
I will say for crumb coating, make sure the cake and the frosting are both nice and cold! But you don't want the frosting to be so cold that it tears the cake either. And after the crumb coat let it sit in the fridge for probably at least 30 minutes so it is totally solid.
Elaine Mitchell says
What would be your best advice to make the cake? Her party is 08/11. Make the cake the night before and the fondant decorations? Put it in the fridge over night and decorate it the day of the party with icing?
valentina says
It won't be horrible!!! You are working so hard and it will be fabulous!! Honestly I would recommend baking it probably 2 days in advance, wrapping it with plastic wrap and letting it sit in the fridge overnight until very cold. You could also do the fondant rainbow at this point too, you want to give it enough time to sit so that it dries completely. 1 day before I would fill and stack the cakes, do the crumb coat and probably the coat of final purple frosting as well. You could also go ahead and do the gumballs and fondant decorations at that point too. I would say if its already ready the day of the party you will save yourself a lot of stress! For the fondant letters, I would recommend to cut out and place them on the cake right away. I would not let them harden as the cake is slightly curved, so they may crack once you put them on the cake that way. Hope that all makes sense. I really would recommend against finishing it the day of the party unless you have no other options.
Elaine Mitchell says
Sorry for all of the questions. I dont want to ruin her party by making a HORRIBLE cake .
Elaine Mitchell says
You said that you used 2 5 inch and 2 8 inch pans to bake the cake. Why does it look like its three layers? Which pans did you use?
valentina says
Hi Elaine, the 5" cakes are small so they bake up thicker. The 8" cakes tend to bake flatter just due to the diameter. I believe I split the cakes in half to create more (thin) layers so I could amp up the height with more frosting in between each. But it will work out either way!
Elaine Mitchell says
Ok perfect thank you much.