
Well, helloooo craft section! Long time, no see! Some of you newer readers might have not even known that I have a craft category but alas, here we are. New year, new wreath! If you know me personally, you'll know that wreaths are kind of my thing. I've got a few on here, including this monogrammed mesh wreath, coffee filter wreath, floral wreath, and chevron burlap wreath, but I also have some that I've made that aren't even on the website. Guess you could say I've got a bit of a wreath issue 😉
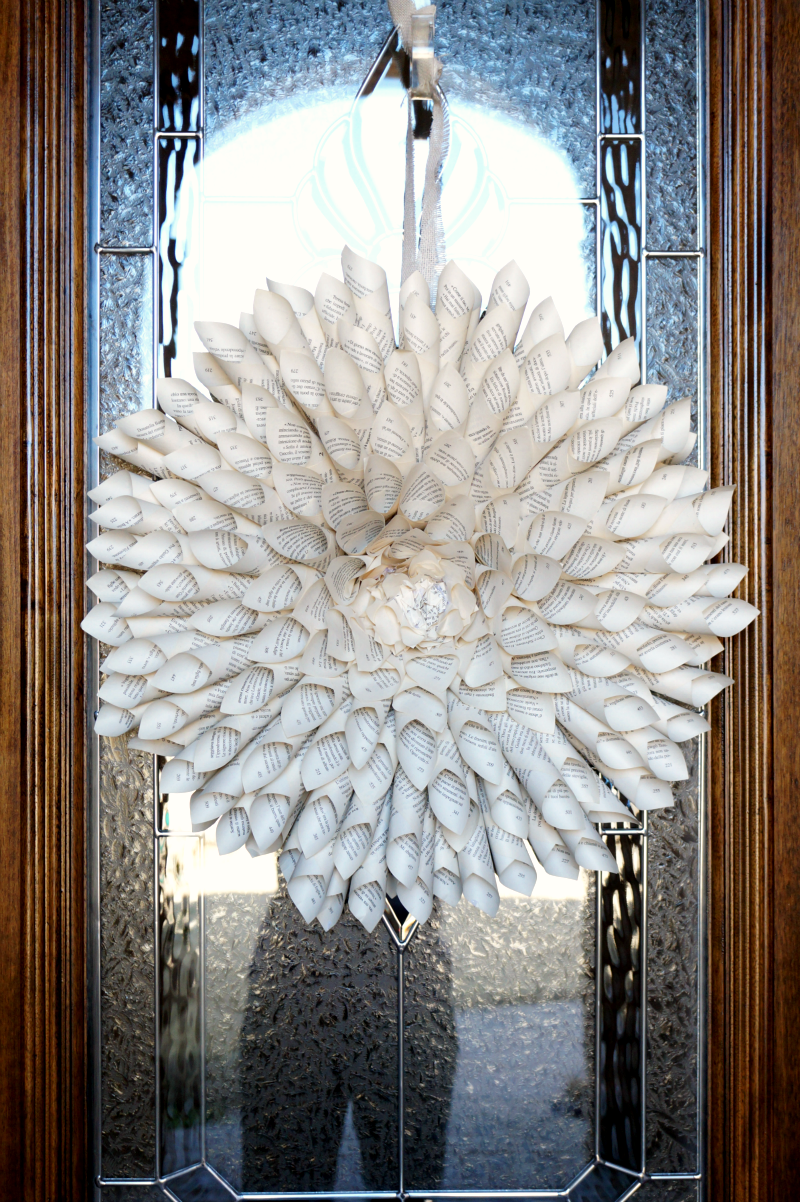
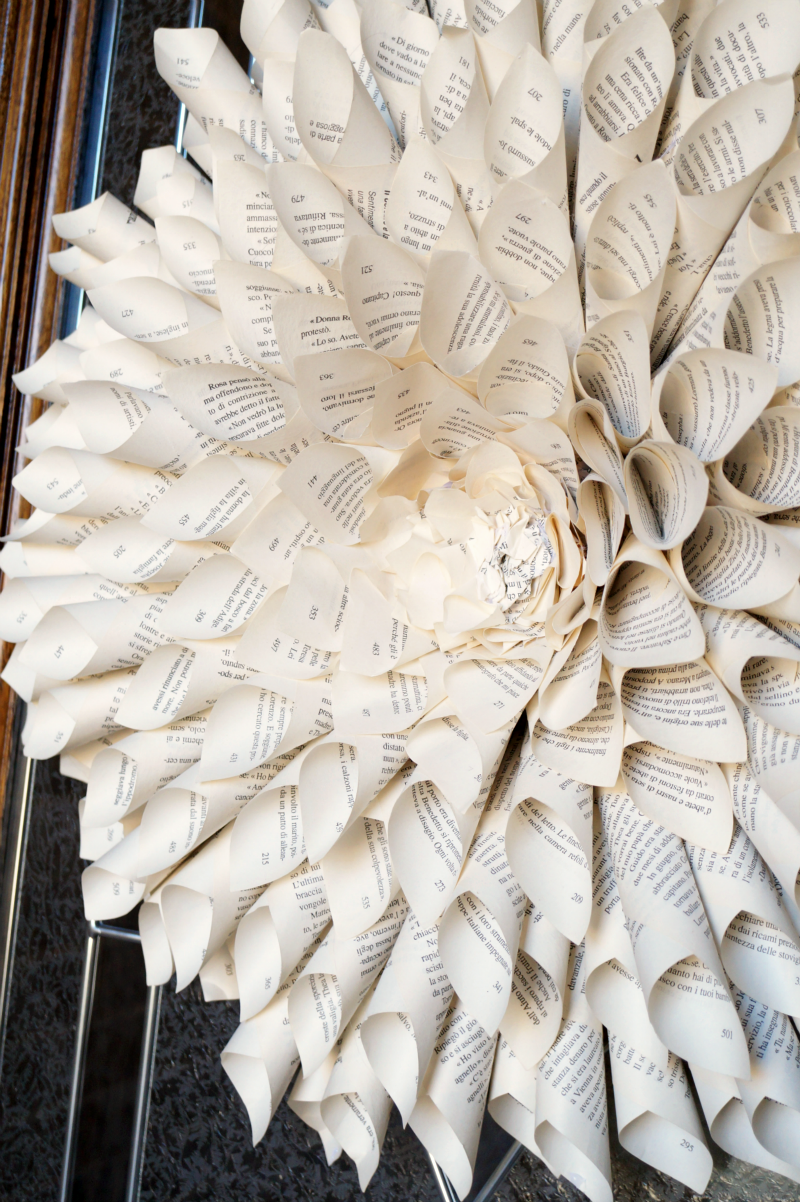
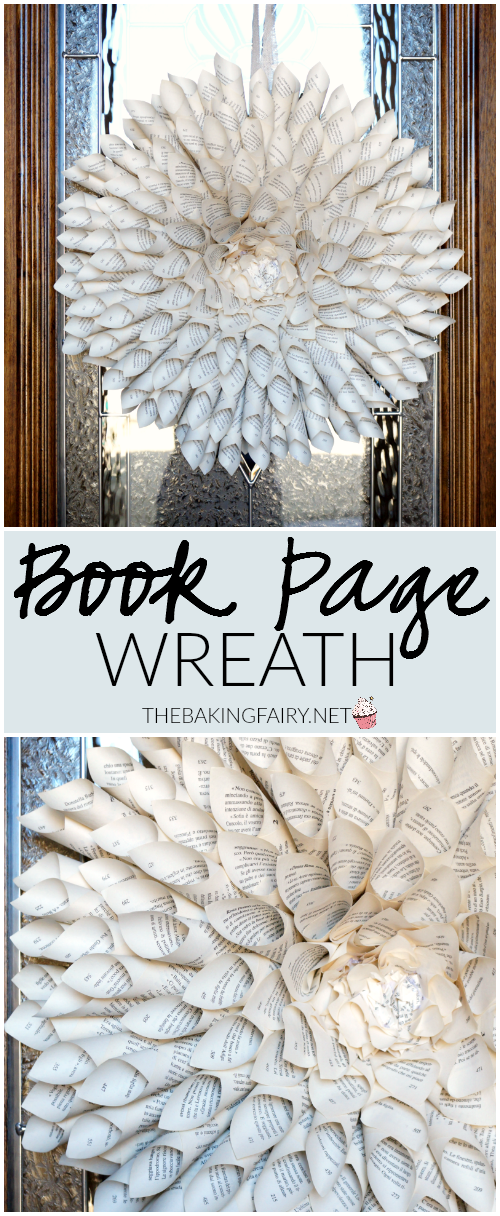
I've been wanting to make a book page wreath for awhile, and I figured now was the perfect time. Of course I have a Christmas wreath for December, and I have a bright floral wreath for the spring, but what do people put on their doors after the holidays? I can't just leave it bare! Can you imagine the horror?! Ha 😉 I had been planning on running to the thrift store and picking up a random book for cheap, but as my mom and I were cleaning the house, she found this old book that was water-damaged and actually a duplicate of one she already has that's in better shape. Instead of throwing it away, it got repurposed as this gorgeous wreath. Much better than it's earlier form, I'd say. All you need for this project is an old book, some cardboard, tape, and hot glue. Let's get to work!
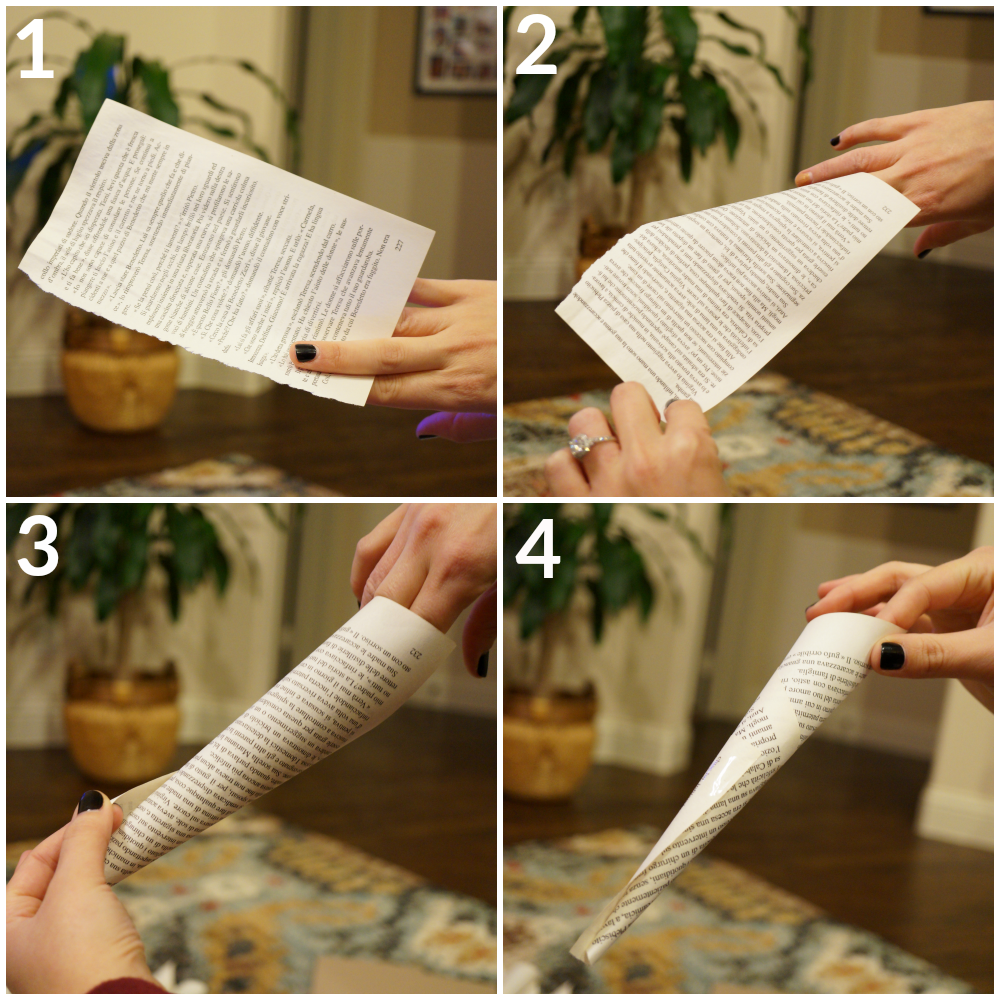
I'm going to try my best to explain how to make the paper rolls, because I'll admit it took me a few tries to really get the hang of it.
- Hold your paper pinched between your index and middle fingers, with the "ugly" side facing to the left. This is the edge that will get rolled up and hidden inside the roll, so I hid the ripped part of the pages.
- Grabbing the opposite corner, fold the page up and over your fingers.
- Keep rolling the page until you form a tight, neat roll. Don't let go with your fingers yet!
- Tape the edges to secure. Use 2-3 pieces of tape, especially if the book is old, because the tape will pop off and unroll your page. Trust me. Don't skimp on the tape. 😉
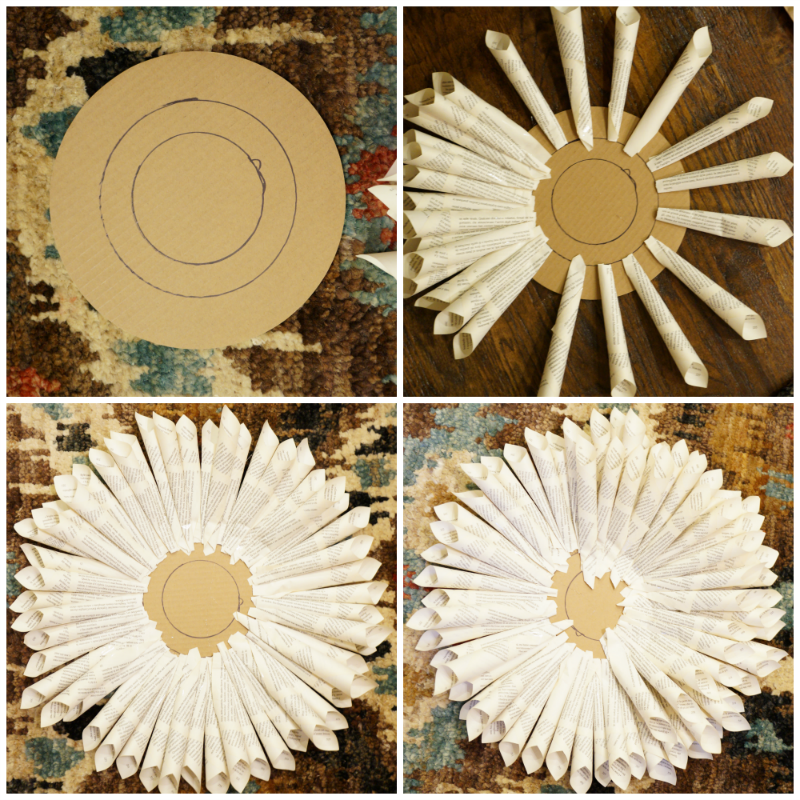
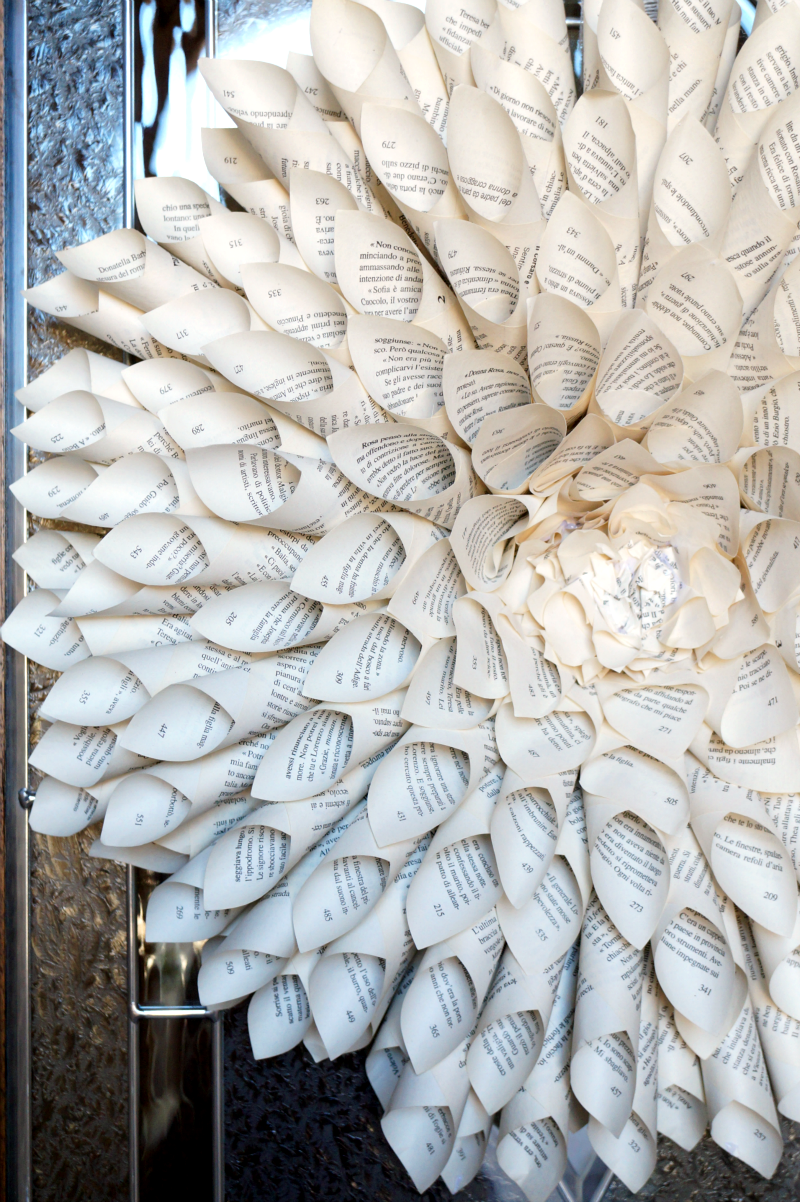
So once you've made all your paper rolls, time to start making the wreath! Cut a round out of cardboard about 10" across... of course you can make it bigger or smaller depending on how big you want your wreath! Draw circles at 8" and 6" as well as a guide. Now start hot gluing! I first glued on 4 rolls on the outer-most circle across from each other to serve as guides, and then just glued rolls in-between to fill. Once you're done with the first layer, start on the second and work your way around once again. After that, start trimming your rolls just a bit as you glue so that they start getting smaller and smaller! Once I reached the middle, I just crumpled up half of a page and glued that in the middle for the center of the flower. And then you're all done!
And now you have a gorgeous, flowery book page wreath to get you through the winter! If there's any steps that are confusing, just post a comment and I'll be happy to help 🙂 Happy crafting!


Leave a Reply