
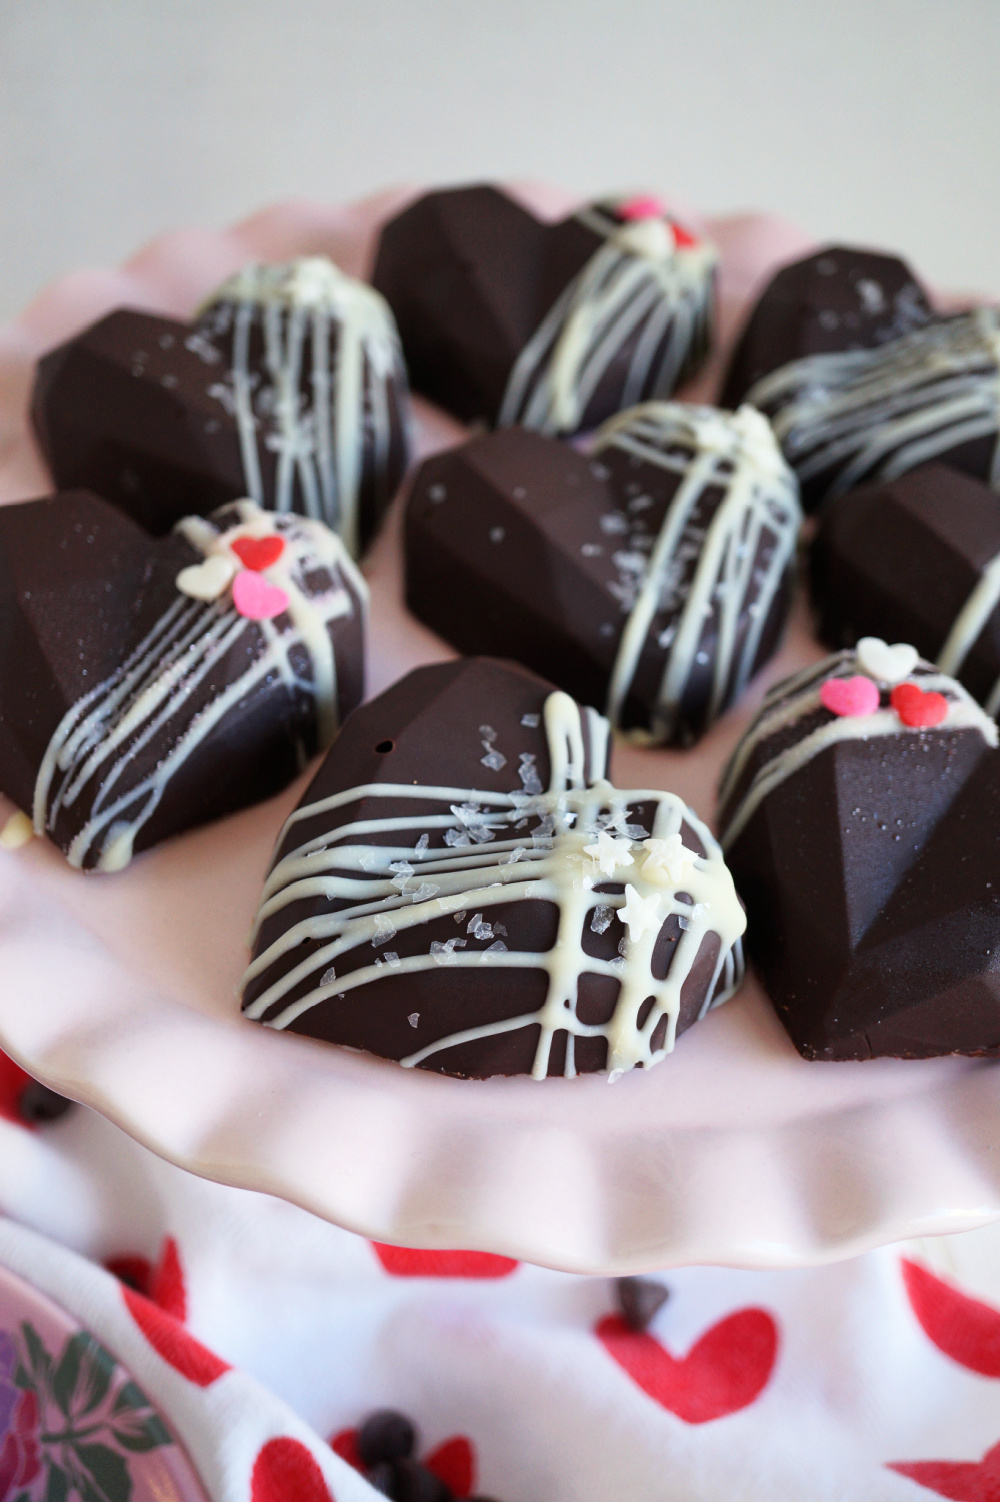
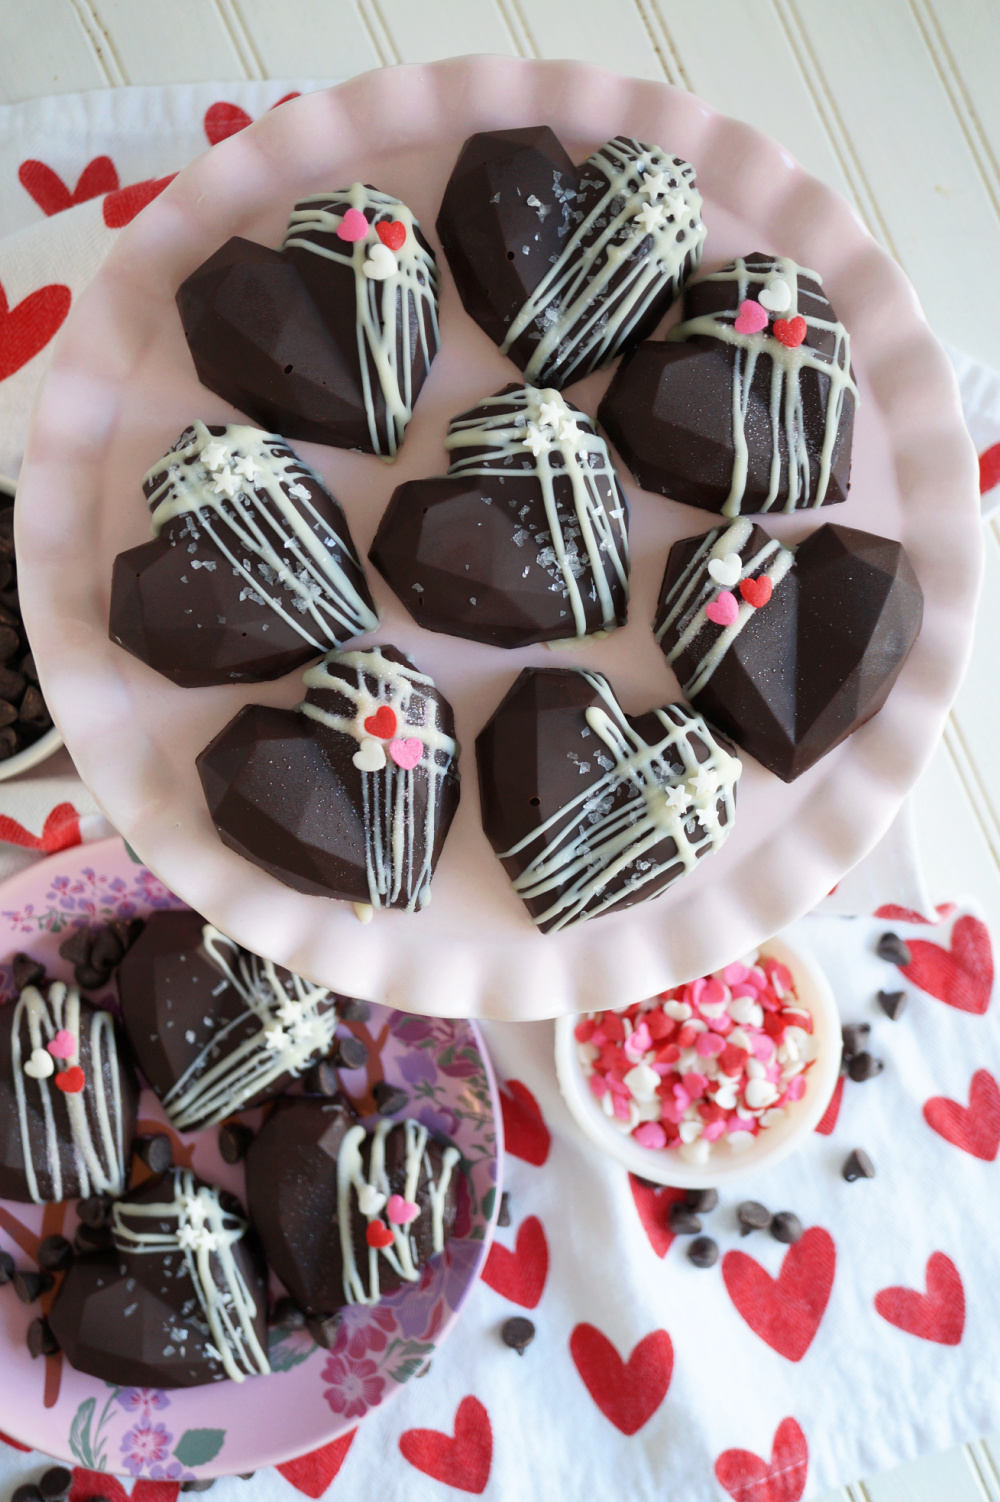
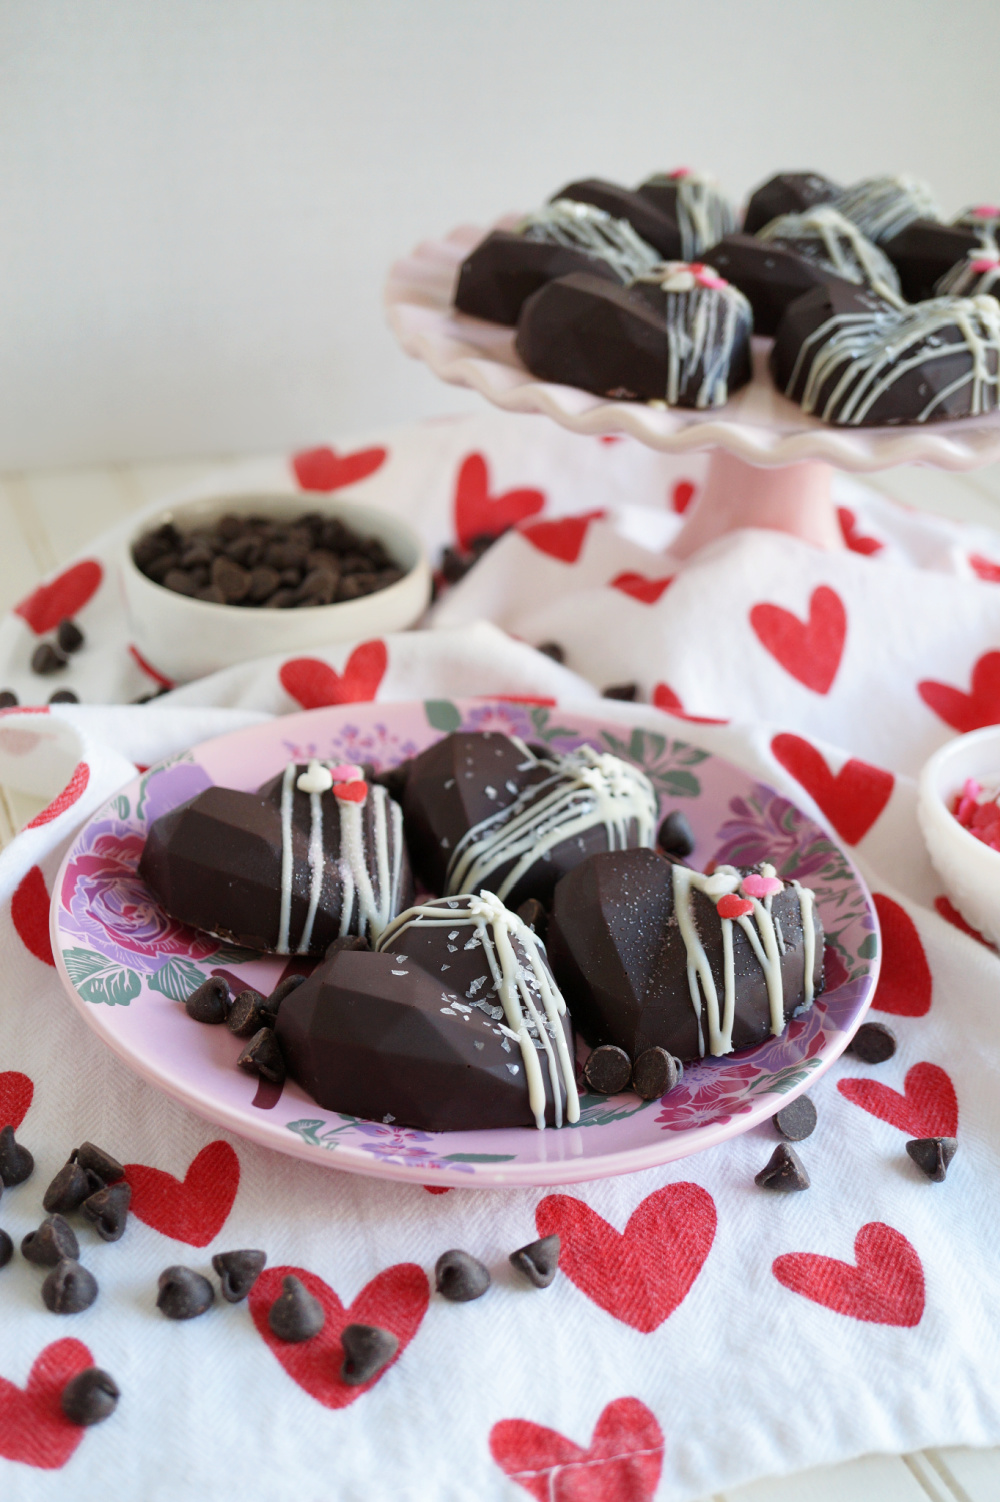
These Vegan Chocolate Cake Gems are a fun and sophisticated upgrade to the classic cake pops! Crisp chocolate shell envelops a sweet mixture of cake and frosting for a fun treat.
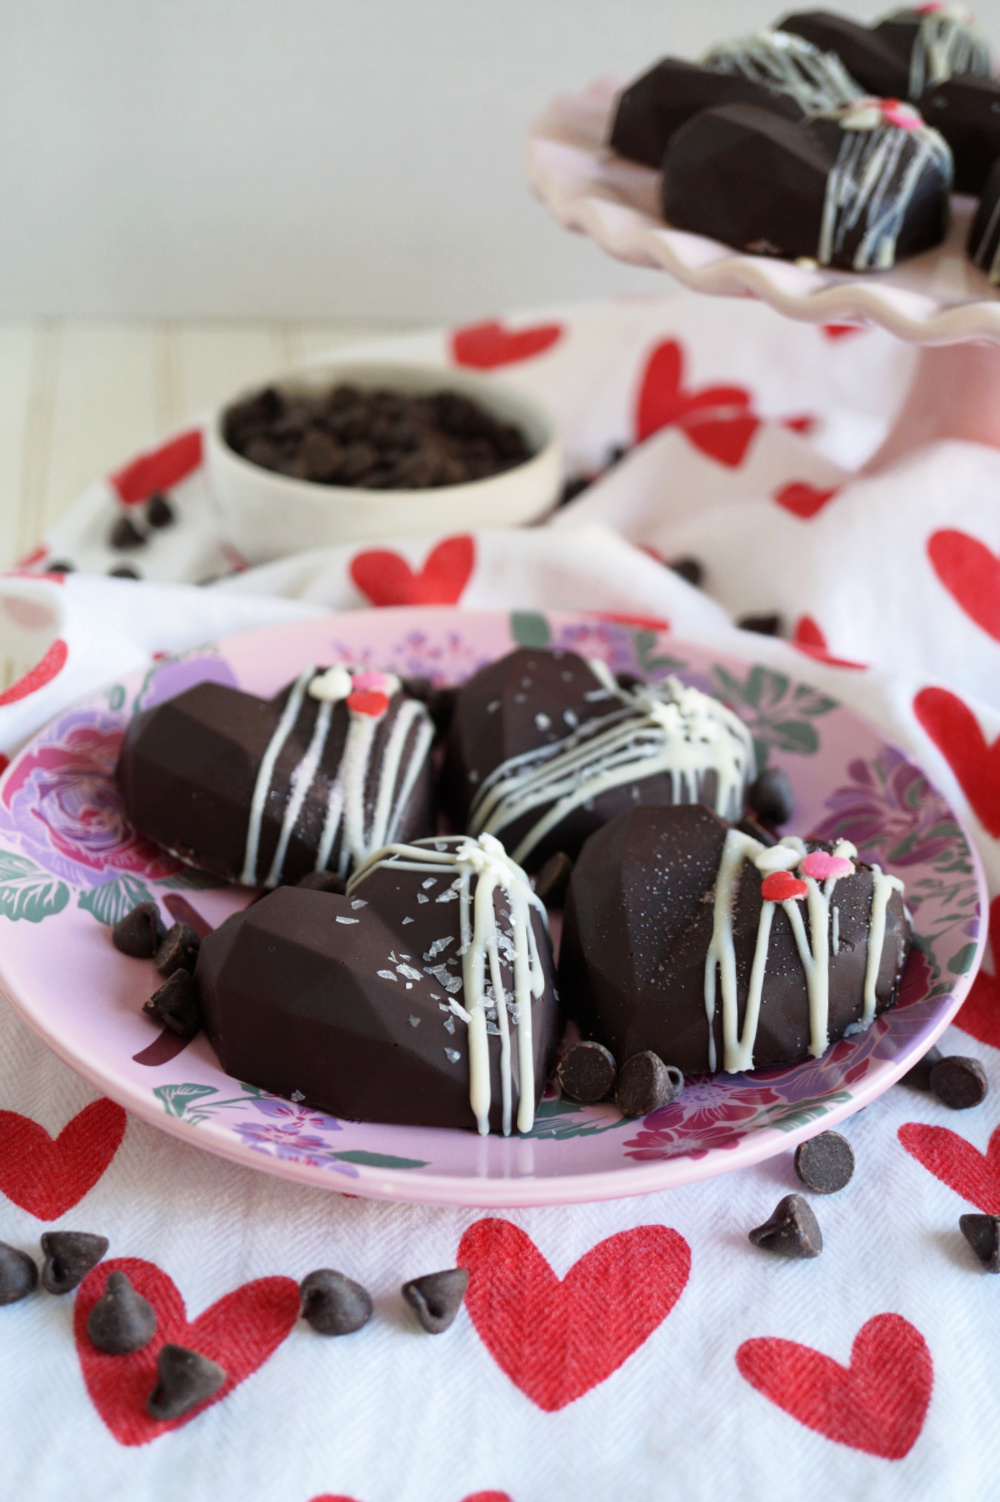
Hello friends! Valentine's Day is coming up fast - less than a week til the big day. I have these super cute Vegan Chocolate Cake Gems that I'm sharing today, which are a perfect edible gift for anyone special in your life! They may seem hard, but they are actually much easier to make than you'd think. What you have here is a crisp chocolate shell encasing a mixture of cake and frosting for the ultimate sweet bite. If you remember cake pops - well, these are basically the 2021 version of that. I'm obsessed with these!
What do I need to make these chocolate cake gems?
- Heart shaped mold - you only need one piece of special equipment for this recipe, and it is these heart molds! You can certainly use a different shape, just make sure the mold is food-safe and made of silicone for easy removal.
- Vegan chocolate - I bought some semisweet chocolate chips from my trusty Costco which are vegan! I have also made these with vegan white chocolate - I either use the Nestle allergen-friendly line or the Walmart brand of allergen-free white chips. Both work great. Feel free to use your favorite chocolate for these!
- Cake crumbs - being a baker, I always have leftover crumbs from trimming my cakes down to size and I just keep them in the freezer! If you're baking cake just for these cake gems, note that a little goes a long way. Even 3-4 cupcakes should be more than enough to fill these up! You can use whatever flavor you'd like. So far, I have done chocolate, red velvet, coconut, and lemon with great success!
- Frosting - I am a firm believer that homemade frosting tastes so much better and it takes your baked goods to a whole new level! Same as with the cake crumbs - I always have some leftovers with my baking projects so I have been using these gems to clear out my freezer stash. I recommend using my basic vegan frosting recipe, just cut it down to 25% as you don't need that much!
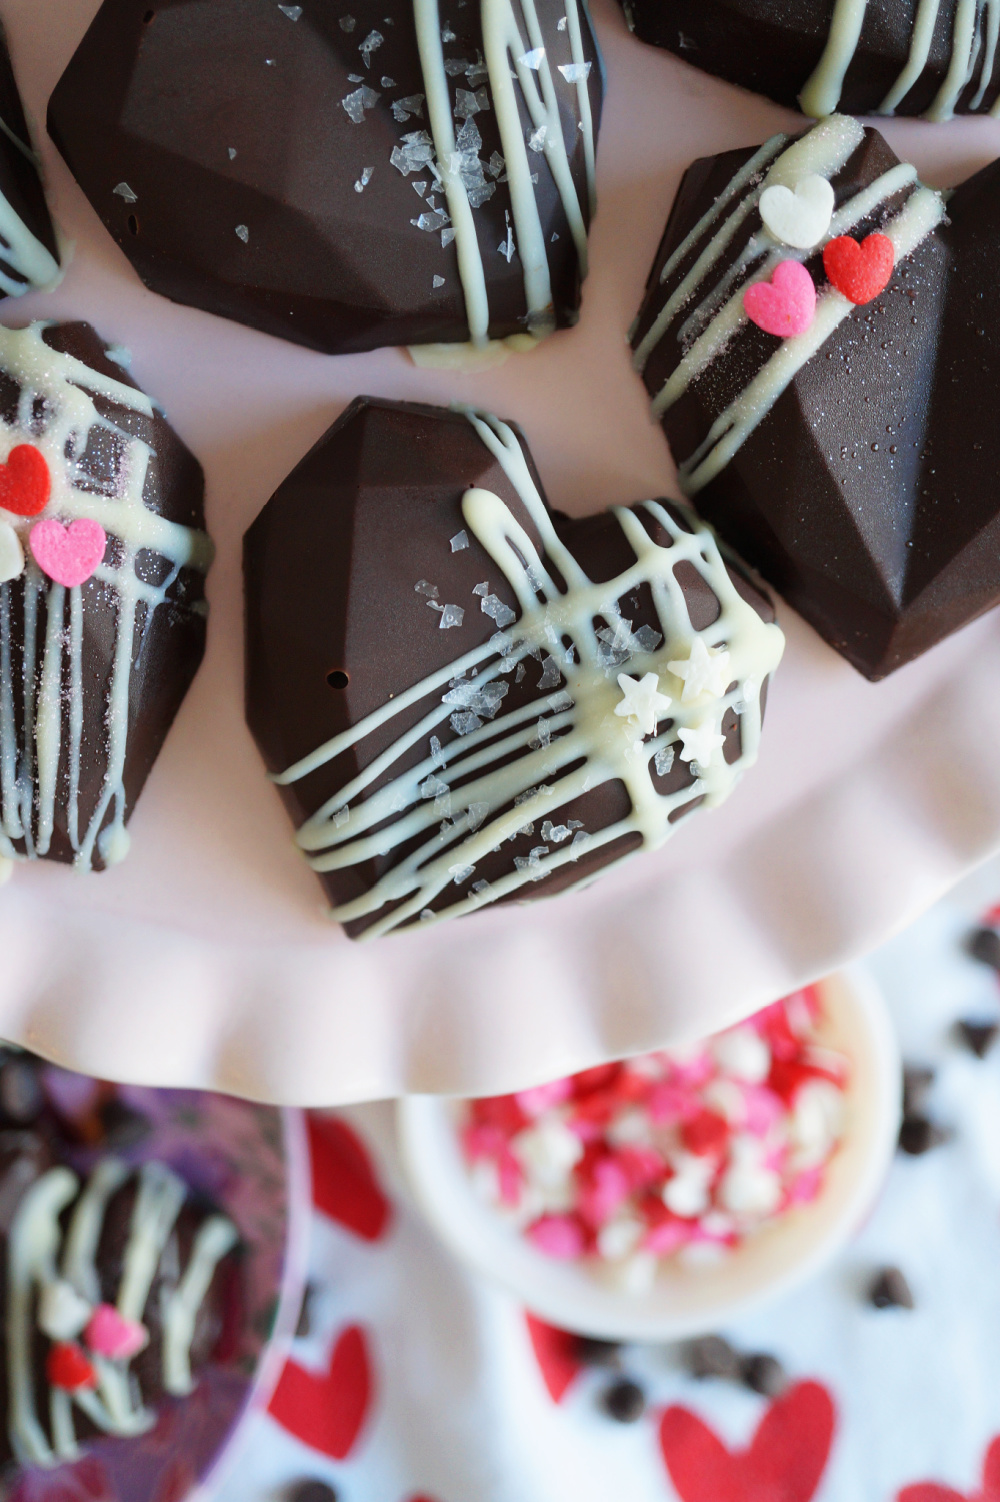
- Sprinkles - decorating the cake gems is the best part! Add on sprinkles or edible glitter to your heart's content. The sprinkles I used today are from Sweets & Treats - they have a vegan line!
How do I make these chocolate cake gems?
- Melt down your chocolate! Do not add any cream, milk, or anything to it - we don't want a ganache in this case. We want the chocolate to harden again once it's chilled. I usually microwave it in 30 second intervals until smooth and melted. You could also do this in a double-boiler on the stove.
- Using a spoon, coat the inside of your heart molds with the melted chocolate. Try your best to get all the way up the sides and in all the nooks and crannies. Place in the fridge to chill.
- When the first layer of chocolate has set, do a second thin layer to reinforce the sides. They tend to be delicate and can break when you un-mold the hearts! Place back in the fridge to chill again.
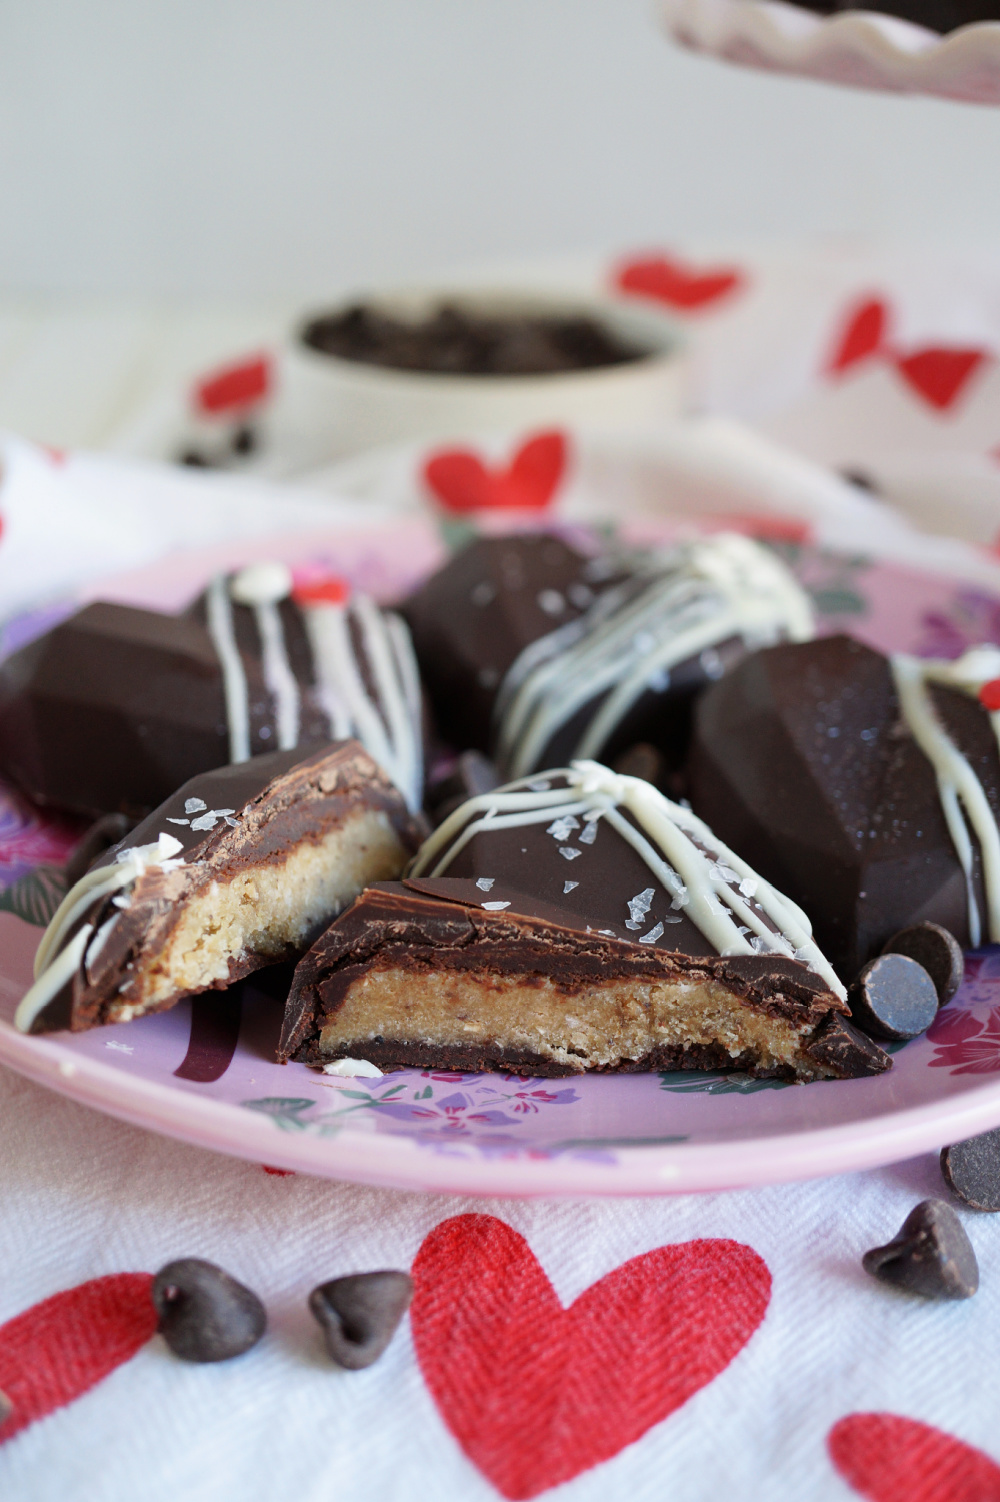
- While the chocolate sets, prepare your cake mixture. Crumble up some (cooled) cake into a medium bowl, and add in some frosting. Mix it all up with a spoon (or your hands!) until it is a soft and moist consistency. You don't want it to be too dry and crumbly, but you also do not want it to be too mushy. Add frosting as needed until it's right. It should hold its shape when pinched between your fingers.
- Now, it's time to put it all together! Fill your chocolate heart molds with your prepared cake and frosting mixture. You want to fill them about ⅞ of the way and gently press the cake mixture in. Leave a small space at the top to seal with chocolate.
- Finally, use more melted chocolate and pour it on to finish the hearts. Use an offset spatula to smooth the chocolate and scrape off any excess. Time to place the cake gems in the fridge one last time to set. Allow a good 20-30 minutes to make sure they are solid and won't fall apart when you take them out of the mold.
- When ready, gently remove the hearts from the molds. You are done! Decorate the tops with additional melted chocolate and sprinkles as desired.
I hope you guys will give these chocolate cake gems a try - they are so fun to make and absolutely delicious. Feel free to mix and match flavors to your preference! They're a perfect way to use up any cake scraps - or a great excuse to get to baking! 🙂
Here are some cake recipes to try for the filling!
vegan chocolate cake gems
Ingredients
- 2 cups vegan chocolate chips
- 1 cup cake crumbs
- 2-4 tablespoon vegan frosting
- sprinkles as desired for decorating
Instructions
- First, prepare the chocolate shell. Place chocolate chips in a microwave safe bowl, and heat in 30 second increments until smooth and creamy.
- Grab your chocolate molds, and use a spoon to coat each mold with chocolate. Be sure to get in all the crevices and corners, and go all the way up to the edges. Place in the fridge to set when done.
- Once the first layer of chocolate has set, repeat the same process one more time. Place back in the fridge to set again.
- While the chocolate is setting, prepare the cake mixture. Use your hands or a fork to crumble up cooled cake or cupcakes. Start by adding in 2 tablespoon of frosting and see how the texture is. You want it to be smooth and creamy but not too mushy. Add more frosting as desired and mix well. The cake mixture should hold its shape when pinched between your fingers.
- Now, it is time to fill. Add the cake and frosting mixture to your set chocolate molds. Fill about ⅞ of the way - you need a small margin at the top to seal your chocolate gems.
- Grab your melted chocolate one more time (you will likely need to re-melt at this point, that's ok) - spoon some chocolate on top of each mold and use an offset spatula or butter knife to smooth it out. Try your best to make sure the bottom is very smooth and flat, and scrape off any excess chocolate. Refrigerate one more time to set, for a good 20-30 minutes.
- Once the gems have completely set and hardened, gently remove them from the silicone molds. Decorate the tops of your cake gems as desired with additional chocolate and sprinkles. Enjoy!!
*Disclosure: I am part of the Amazon Associates Program, and there may be affiliate links on this page. If you buy anything through my website, I will receive a small percentage of the profit at no extra cost to you. Thank you for supporting my blog!*


Mieco says
I have not made these but I’m Definitely going to. What an awesome idea!! Who would have thought to use a silicone mold to make cake pops!! You are an absolute GENIUS!!!❤️